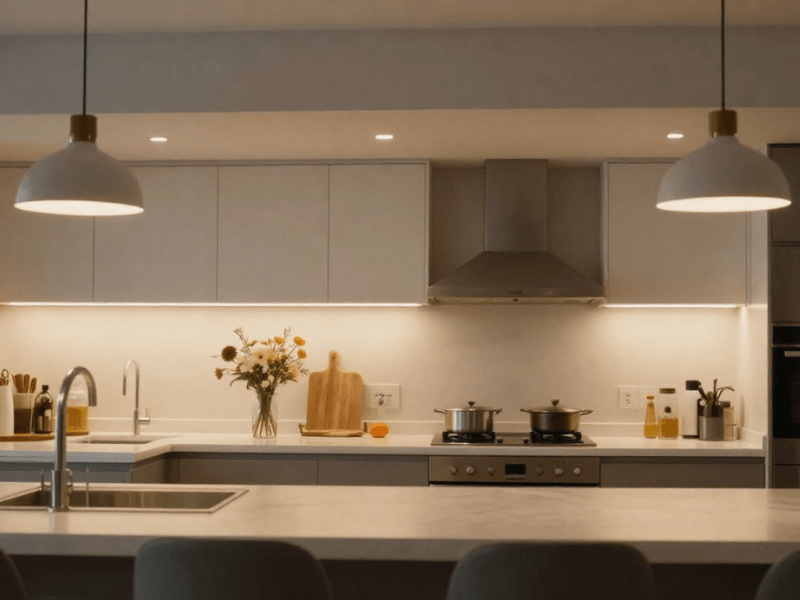






If I told you to think about kitchen lighting, what would you think of? Your thoughts would most probably go to ceiling fittings, pendant lights, under-cabinet lights and decorative wall lights.
Understandable. Those lights are what shape your kitchen lighting.
But there’s one lighting that’s easy to overlook. And it provides both practical and decorative light in your kitchen.
I’m talking about kitchen plinth lighting. What’s that, you ask?
Plinth lighting adds a low-level layer of illumination beneath cabinets, islands and other kitchen units. Use it well, and it can highlight the shape of your cabinetry, create a subtle floating effect, define islands and peninsulas, and add a little ambient light where you didn’t think you needed it. (But you totally do!)
It can also be surprisingly useful at night.
If you frequent the kitchen late at night, low-level lighting can provide enough illumination to help you move around the space without blinding you with super-bright ceiling lights.
“So if my cabinets have a kickboard, I should add plinth lights?”
Not necessarily. The best results come from deciding what you want the lighting to achieve first. Only then should you choose a suitable fitting, brightness, colour, and position to achieve it.
In this guide, we’ll walk through different plinth lighting ideas you can easily implement at home. We’ll also discuss common lighting mistakes and how to plan and execute your plinth lighting installation properly.
What Is Kitchen Plinth Lighting?
First, understand that plinth lighting is primarily an accent and ambient lighting solution, not a replacement for task lighting. It's lighting installed at or near the bottom of kitchen cabinets, units, or islands.
Their primary function is to illuminate the floor and the area immediately around them.
The term "plinth" refers to the panel at the bottom of a kitchen unit, sometimes also called a kickboard. By positioning LEDs around this area, you can create a pool or line of light across the floor.
Several ways can achieve the look.
LED strip lighting is a popular choice when you want a continuous line of light. You can cut it to your needed length and position it along longer runs of cabinets, making it useful when you want a clean, uninterrupted line of light.
Individual LED plinth lights create separate points of illumination. These can be a good choice when you prefer defined pools of light rather than one continuous line.
Recessed LED plinth lights are fitted into the plinth or cabinetry itself, creating a neat, built-in look where the cabinet construction allows.
Surface-mounted LED plinth lights sit on the surface rather than being recessed. They can be simpler to install when cutting into the plinth isn't practical (or not allowed, as in the case of rental properties).
The best option depends on your preferred look, how your cabinets are constructed, how much space is available, whether you prefer continuous or individual lights, and what installation requirements you need to work around.
Plinth Lighting vs Under-Cabinet Lighting
They might sound similar… and they are, in a way, but plinth lighting and under-cabinet lighting do very different jobs.
Under-cabinet lighting sits beneath wall cabinets and primarily illuminates worktops and preparation areas. It is part of your practical, task-focused lighting.
Plinth lighting sits at the bottom of base cabinets and directs light towards the floor. It is mainly used for accent, atmosphere, and low-level visibility.
But here’s the thing: there’s no need to choose one over the other. Use both to create a more complete, layered kitchen lighting scheme.
15 Kitchen Plinth Lighting Ideas
1. Add LED Lighting Beneath Base Cabinets
Placement: Along the bottom edge of your base cabinets.
Lighting effect: A continuous line of light that gently washes across the floor.
Best product type: LED strip lighting for a seamless run.
Colour/brightness: Warm white creates a softer atmosphere, while natural white gives a cleaner appearance.
Control: Wall switch, dimmer or smart controller.
An LED strip light is one of the simplest ways to add plinth lighting to your kitchen. You can position the strip so the LEDs are hidden from normal standing view.
The goal is a continuous wash of soft light, so an aluminium profile with a built-in diffuser is a good addition.
2. Create a Floating Kitchen Unit Effect
Placement: Recessed or concealed beneath the bottom edge of cabinets.
Lighting effect: A soft wash of light between the cabinet and floor, giving the units a visually separated appearance.
Best product type: Concealed LED strip or recessed plinth lights.
Colour/brightness: Warm or natural white at a subtle level.
Control: Dimmer or separate switch.
Plinth lighting can give cabinetry a floating appearance by creating a visual gap between the units and floor.
What’s important here is positioning. Rather than pointing bright LEDs directly toward the open space of the kitchen (and toward the people within the space), aim the lights downward to wash the floor.
This helps create that floating effect and prevent glare.
3. Illuminate a Kitchen Island
Placement: Beneath the front face, side panels, or end panels of the island.
Lighting effect: Defines the island while adding a subtle glow around its base.
Best product type: LED strip for continuous illumination or individual plinth lights for defined points.
Colour/brightness: Warm white for atmosphere, or natural white to match a contemporary scheme.
Control: Separate island zone, dimmer or smart control.
Kitchen islands are a strong candidate for plinth lighting because they are often visible from several sides.
A continuous strip can run along the front of the island, while shorter sections can highlight side or end panels. Alternatively, you can space individual LED lights along the plinth for a more defined look.
Island lighting can best be appreciated when the main kitchen lighting is dimmed or switched off.
4. Highlight a Kitchen Peninsula
Placement: Along the exposed side or front of a peninsula.
Lighting effect: Defines the peninsula's shape without making it overly bright.
Best product type: LED strip or small individual plinth fittings.
Colour/brightness: Keep the brightness relatively subtle. The peninsula does not need to stand out.
Control: Use a separate switch or dimmer where practical.
If you have an open-plan space, the peninsula is a natural visual boundary for the kitchen. Adding low-level lighting beneath the exposed side can emphasise that border.
For the best effect, focus on the sections visible from the main room and avoid adding unnecessary light to areas that will barely be seen.

5. Light the Ends of Kitchen Cabinets
Placement: Beneath exposed cabinet ends or decorative panels.
Lighting effect: Draws attention to feature cabinetry and open ends.
Best product type: Short LED strip sections or individual LED plinth lights.
Colour/brightness: Match the rest of the kitchen.
Control: Connect to the main plinth circuit (if any) or use a separate zone.
This doesn’t mean that all cabinets need to be illuminated. But cabinets with exposed ends, decorative panels, and featured designs can become kitchen focal points with carefully positioned lighting.
6. Add Lighting Around a Breakfast Bar
Placement: Beneath the breakfast-bar structure or its overhang.
Lighting effect: Visually separates the breakfast area from the main kitchen.
Best product type: Concealed LED strip.
Colour/brightness: Warm white works well for a relaxed setting.
Control: Dimmer.
A breakfast bar can act as a natural transition between the kitchen and dining or living space. Low-level lighting underneath it can reinforce that separation while adding a little evening atmosphere.
Keep the light directed toward the floor rather than toward seating areas to avoid unwanted glare and shadows on adjacent furniture or walls.
7. Use Motion-Activated Plinth Lighting
This is where plinth lighting becomes more than a decorative feature.
Add a motion sensor to your plinth lights, so they automatically activate when someone approaches the kitchen, making them useful for night-time trips for a glass of water or maybe a little midnight snack.
They can be particularly useful in family homes and kitchens connected to open-plan living areas.
Just remember to check that the sensor is compatible with your chosen LED lights, and position it properly for reliable detection.
8. Create a Night-Time Kitchen Lighting Layer
Placement: Around the most frequently used cabinet runs and island.
Lighting effect: Gentle floor-level illumination for navigating the kitchen.
Best product type: Dimmable LED strip or individual plinth lights.
Colour/brightness: Keep it subtle and comfortable for evening use.
Control: Dimming, sensors, or separate switching.
Did you know your kitchen doesn't need to run at full brightness all day and all night?
Plinth lighting can form part of a dedicated night-time lighting layer, working alongside under-cabinet lighting, dimming, and sensors. The goal is to provide useful low-level illumination for safe and effective navigation around the space.
Test the light at night to find the most comfortable brightness level. This is why a dimmer is one of the best controls you can add to upgrade your kitchen lighting.
9. Use Warm White Plinth Lighting for a Softer Kitchen
Warm white lighting can work beautifully in traditional kitchens, wood-effect cabinetry, and open-plan living spaces.
It is also a natural fit for evening entertaining, when you want the kitchen to feel connected to the rest of the room rather than brightly lit like a workplace.
Just make sure the other active lights in the kitchen are in the same colour-temperature range. Otherwise, the space will feel disconnected and unbalanced.
Smart lighting controls let you create presets you can use to adjust your lights with a tap on your smartphone.
10. Use Natural White for a Contemporary Kitchen
Natural white suits modern kitchens where you want a cleaner, more neutral look. It also works well for practical everyday lighting.
Again, consistency matters. Never use a natural white colour temperature for your plinth lights if the rest of your kitchen zones use warm white lighting.
11. Add RGB Plinth Lighting for a Statement Kitchen
Placement: Beneath islands, cabinets or selected feature areas.
Lighting effect: Colour-changing decorative effects.
Best product type: RGB LED strip.
Colour/brightness: Any colour of your choice.
Control: Remote or compatible smart controller.
RGB plinth lighting adds a little personality to your kitchen. Instead of switching your main lights to RGB, you can use your plinths. So treat them as feature lighting, not your main kitchen illumination. Your everyday task and ambient lighting should still do the practical heavy lifting.
12. Use Plinth Lights to Outline an Island
Placement: Selectively around the island perimeter.
Lighting effect: Defines the island's footprint.
Best product type: LED strip or individual fittings.
Colour/brightness: Coordinate with the rest of the kitchen.
Control: Use separate island control or a dimmer.
You do not necessarily need to illuminate every side of an island.
Selective lighting around its perimeter can be enough to make the island stand out, particularly in an open-plan room. This can create a clear visual outline without making the whole unit look excessively bright.
13. Create Continuous Light Along a Run of Cabinets
Placement: Along a long cabinet run.
Lighting effect: Smooth, uninterrupted illumination.
Best product type: High-density or COB LED strip with a suitable aluminium profile and diffuser.
Colour/brightness: Match surrounding kitchen lighting.
Control: Dimmer or standard switching.
This one is a more visible installation. To create a clean line of light, an LED strip is hard to beat. LED density and diffuser choice matter because they influence how smooth the finished line looks.
That’s why a compatible profile with a diffuser or a COB strip is an ideal choice here rather than an exposed standard LED strip.
14. Highlight Feature Cabinetry
Placement: Beneath selected cabinets only.
Lighting effect: Creates visual hierarchy and draws attention to particular areas.
Best product type: Short LED strip sections or individual fittings.
Colour/brightness: Keep it consistent with the wider lighting scheme.
Just because you have a cabinet doesn’t mean you need to illuminate each one. Try illuminating only the island, a feature cabinet, the peninsula, or an open-shelving zone. This creates contrast and guides the eyes toward the space that you want to be noticed most.
Because think about it: if every part of your kitchen is shouting for attention, then all you’re left with is a “noisy” space.
What did that famous animated film’s villain say? “When everyone is super, no one will be”?
15. Combine Plinth Lighting With Under-Cabinet Lighting
This is where the whole idea of layered lighting comes together.
Under-cabinet lighting can illuminate the worktop and preparation area, while plinth lighting adds a low-level glow around the floor. Keeping the two layers on separate controls lets you create different scenes for cooking, cleaning, entertaining, or relaxing.

How to Choose the Right Kitchen Plinth Lighting
Now that you have an idea of the effect you want, choosing the right light fitting becomes much easier.
Disclaimer: There is no single "best" plinth light for every kitchen.
LED Strip Lights vs Individual Plinth Lights
These are the two most common plinth lighting options.
LED strip lighting is a strong choice if you want continuous light along your cabinets. They’re thin and flexible, so they’re easy to position and mount in tight spaces such as your kitchen cabinet base/kickboard. They work best with LED profiles for a more seamless line of light.
Individual LED plinth lights create separate pools of illumination and can work well when you want a traditional plinth-light look or need to light just specific sections, not an entire run.
The two are installed differently, so consider this carefully. Strip lighting offers considerable flexibility, but it may require careful planning around cutting, connections, profiles, diffusers, and cable routes. Most of the time it’s simply “peel and stick”.
Individual fittings are easier to separate into distinct lighting points, but you'll need to plan their placement. It's easy to mess up the spacing.
Anchor your choice in the result you want.
-
Continuous glow? Consider an LED strip.
-
Defined pools of light? Individual fittings may be the better fit.
Choose the Right Brightness
Plinth lighting does not need to be as bright as your task lighting. So, you may want to skip the brightest option.
First, figure out where the lights will be positioned. Also consider whether it points directly at the floor or is used indirectly, how reflective your flooring is, the size of the kitchen, and how far away the lights will be viewed.
Adding dimming functions gives you room to adjust the lighting after installation.
Choose the Right Colour Temperature
Warm white creates a softer, more atmospheric look and a more relaxing feel.
Natural white provides a cleaner and more balanced look.
RGB gives you colour-changing decorative effects.
Look at the lighting already in your kitchen. Match the most dominant colour temperature to keep the whole kitchen lighting scheme cohesive.
Consider the IP Rating
Not all parts of the kitchen require waterproof lighting, but checking the environment around the installation still matters.
If you're installing lighting near a sink or another area where water exposure is possible, you will need a fitting with a higher IP rating.
LED Strip vs Plinth Lights: Which Is Best for Your Kitchen?

In the end, it all comes down to your preference.
If you want a continuous glow beneath a long row of cabinets, an LED strip is likely the natural starting point. If you prefer distinct pools of light or want to highlight individual sections, individual plinth lights may suit you better.
The kitchen itself should make the decision. A long, modern minimalist cabinet may benefit from a continuous line, while a traditional kitchen could work better with individual fittings.
So, always consider the kitchen type.
How to Hide and Diffuse Kitchen Plinth Lighting
The biggest principle of a polished plinth-lighting installation: See the light, not the LED.
Hide the LED Strip Behind the Plinth
This is relatively easy to do since the lights are installed close to floor level. Direct exposure can create glare, and the visible LED “dots” aren’t really all that pretty, especially if you’re aiming for a professional-looking finish.
Aim the light towards the floor or use the cabinet structure to hide the source.
Use an Aluminium Profile
If you can’t avoid visible LEDs, consider using an LED profile with a built-in diffuser to make the installation look more finished. Profiles can also protect your strips from knocks and dirt buildup, prolonging their service life.
Add a Diffuser
A diffuser sits over the LED strip or individual plinth lights and helps soften the visible light they produce.
For LED strips, the final appearance depends on several factors, including LED density, whether you use COB or a conventional LED strip, profile depth, diffuser type, and viewing angle.
If you can see obvious bright points from normal standing positions, you may need a different strip, profile, or diffuser, or you simply need to reposition the lights.
How to Plan Plinth Lighting Across an Entire Kitchen
Start by measuring the total length of the areas you want to illuminate. Then decide which sections genuinely need lighting. (Again, you don't need to illuminate every cabinet.)
Next, consider cable routes and where the drivers will be located. Also check the layout: does your kitchen have multiple sections? If so, it can make sense to divide the lighting into separate zones.
Plan the Island Separately
An island sits apart from the main cabinets, so it only makes sense to give it its own lighting scheme. This gives you more flexibility, especially if you want the island to stay lit when you switch off the rest of the plinth lighting.
Keep Light Levels Consistent
Long runs can look disjointed if one section is noticeably brighter than another. Try to keep the brightness, positioning and colour temperature consistent across connected sections. Check specifications to be sure.
Plan for Access to Drivers and Connections
Your lights are important, sure. But so are the other components that make them work. Position drivers and connections thoughtfully, with maintenance in mind. What I’m trying to say is, avoid burying components somewhere that would require dismantling half the kitchen to reach them in case they need servicing or replacement.
How to Calculate the Power Requirements for LED Plinth Lighting
For LED strip lighting, use:
Watts per metre × total strip length = total LED load
For example:
-
8W/m × 5m = 40W total LED load
-
12W/m × 3m = 36W total LED load
This is a good start to selecting other compatible components. Other things to consider:
-
Number of fittings
-
Driver capacity
-
Operating voltage
-
Number of lighting zones
-
Compatibility with controls
Follow the manufacturer's stated specifications and never rely on “educated guesses”.

How to Control Kitchen Plinth Lighting
Wall Switch Control
The simplest option is a wall switch for straightforward on/off control. This works particularly well if you treat the plinth lighting as a separate layer from the main kitchen lighting.
Dimming
Why install separate light fittings for different situations when you can use a dimmable one? You could use a brighter setting when the worktop and hob are in use, then reduce the output for a softer evening glow.
Make sure the LED products, driver, and dimmer are compatible before installation.
Motion Sensors
These are useful for night-time plinth lighting. The lights activate as you approach, providing low-level illumination without fumbling for a switch. Again, check compatibility between the sensor and the whole LED system.
Remote and Smart Control
These can be useful for RGB lighting and more advanced lighting controls. However, keep in mind that not every LED strip can connect directly to a smart-home system. As with any LED installation, the strip, controller, driver, and smart platform must all be compatible.
How to Install Kitchen Plinth Lighting
Step 1: Measure the Plinth Area
First, determine which sections need lighting, then measure their lengths carefully.
Step 2: Decide on the Lighting Position
Decide whether the light will face the floor, back toward the cabinet, or through a diffuser.
Step 3: Choose the Lighting Product
Depending on your preference and cabinet construction, you can then choose between LED strips or individual plinth lights.
Step 4: Plan the Driver and Cable Route
Calculate the total load and select compatible components. Plan where cables and drivers will sit before fixing anything permanently.
Step 5: Test the Lighting
Test the lights before installing them permanently. This is your chance to spot uneven brightness, glare, or unwanted shadows. Troubleshooting is easier at this stage.
Step 6: Install the Lighting
Follow the manufacturer's installation instructions. Use the appropriate components for the system.
Step 7: Adjust the Lighting
Stand in the kitchen's normal viewing areas and assess how the lights behave. If needed (and where possible), adjust the position or brightness to reduce glare. Indirect lighting is an ideal choice for more seamless kitchen lighting.
Safety note: A competent person (preferably a certified professional) should carry out mains electrical work in accordance with applicable UK requirements.
Common Kitchen Plinth Lighting Mistakes
Making the Lighting Too Bright
With plinth lighting, brighter isn’t better. They’re best used to complement the room rather than dominate it. Even a low-level accent light can feel harsh if it's too bright.
This is where dimmers earn their keep. Make sure the LED supports it.
Installing the LEDs Where They Are Clearly Visible
Nothing spoils an otherwise professional installation more than visible LED points that create glare. Conceal the strip where possible, and consider an aluminium profile with a diffuser where you can’t.
You only need the light, not its source.
Using Different Colour Temperatures Throughout the Kitchen
Ever stepped into a kitchen that feels off despite the whole space being well-organised? It’s probably the different whites mixed together making the lighting feel disconnected.
Follow the colour temperature your kitchen is already using.
Forgetting the Kitchen Island
The island is often the kitchen's centrepiece, yet it can easily be forgotten when planning low-level lighting. Treat it as its own lighting zone, with its own controls for more flexibility.
Not Planning Cable Routes
I believe I’ve already stressed enough how important planning your cable routes is, even in several other guides apart from this one. Visible and tangled cables are aesthetic killers.
Good lighting is only as good as its cable management.
Choosing the Driver at Random
Check the voltage, wattage capacity, driver type, and control compatibility against the LED lighting you are using. Never choose a driver just because it has enough capacity.
Kitchen Plinth Lighting Ideas by Kitchen Style
This should be obvious, but different kitchen designs need different lighting approaches.
Modern Kitchen
For modern kitchens, consider:
-
Continuous LED strip lighting
-
Natural white tone
-
Recessed profiles
-
Minimal visible hardware
A smooth, concealed installation works particularly well with clean cabinet lines.
Traditional Kitchen
For traditional kitchens, consider:
-
Warm white tone
-
Subtle individual plinth lights
-
Lower brightness
-
Complementary cabinet lighting
The aim is often to add warmth and provide good lighting without breaking the classic vibe.
Handleless Kitchen
Handleless kitchens already have strong horizontal lines, so you might want to try low-level lighting to reinforce those lines while adding another layer of depth. Keep the strip concealed and use diffusion where appropriate to maintain the clean appearance.
Open-Plan Kitchen
Plinth lighting can help visually connect the kitchen with adjacent living areas. But the key here is restraint. Keeping the lighting subtle allows it to complement the wider room.

Final Thoughts: Use Plinth Lighting as the Finishing Layer
It can be easy to think of kitchen plinth lights as simply another row of random LEDs. But it’s one of the lighting schemes that adds both atmosphere and practical benefits to the space.
Use the plinth lights to highlight cabinetry, define boundaries, and add depth to the kitchen.
If you take one thing away from these kitchen plinth lighting ideas, make it this: focus on the effect, not the fitting. That ultimately decides which type of light you’re going to use: individual plinth lights or continuous LED strip lighting.
Make sure you account for colour temperature, positioning, and driver and cable routes during installation. Also, avoid common mistakes when installing plinth lights, especially not testing the system before finishing the installation.
If you’re ready to transform your kitchen, you can explore Simple Lighting's ranges of kitchen lighting, plinth lights, LED strips, drivers and lighting controls to get your next lighting project going.


0 comments