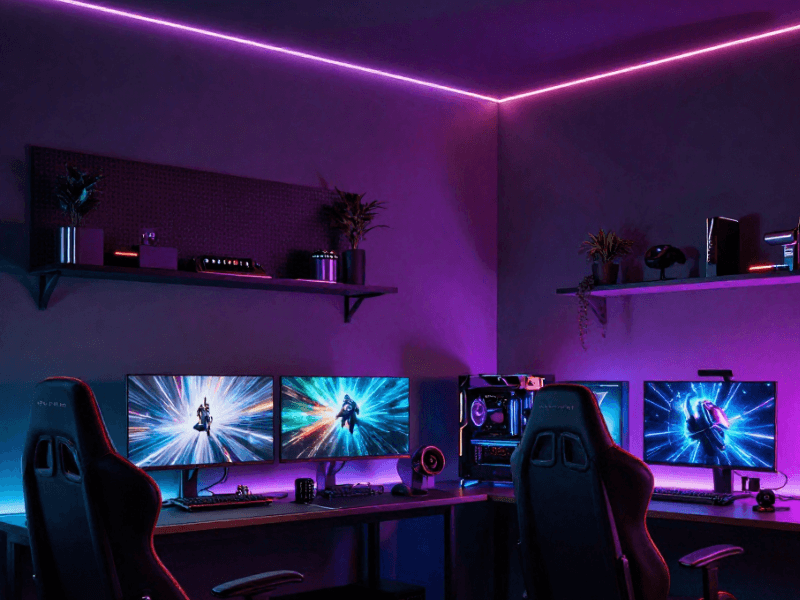












You’ve probably seen this one too many times: A modern interior with concealed LED strip lights lining the ceilings and architectural features. Everything would have been great if not for one thing: a flickering section of the LED strip.
LED strip lights are famous for their smooth, consistent illumination. But when they start giving your space the atmosphere of a budget nightclub, it’s understandably irritating.
But before pointing the finger at your LED strips, you have to understand that flickering does not automatically mean it’s their fault. In many cases, the problem lies elsewhere in the system.
More importantly, the way your LED strip lights flicker can give you a useful clue about what is causing the problem.
Instead of checking every component at random, start with the symptom.
-
Does the whole strip flicker?
-
Does it only happen when you dim the lights?
-
Does the flickering begin at the far end of a long run?
-
Or does everything work perfectly until the lights have been on for a while?
Once you know when and where the flickering happens, narrowing down the likely cause will be a breeze.
In this guide, we will look at the most common reasons LED strip lights flicker, how to diagnose them, and what you can do to prevent it.
First, Identify How Your LED Strip Lights Are Flickering
Once you notice your LED strip lights are flickering, you might be tempted to reach for a screwdriver and tinker. Or, if you have the budget, order a new strip lighting kit.
But I’ll ask you not to do any of that yet. Instead, observe your LED strips. You’ll be shocked to know that flickering patterns can tell you quite a lot.
The Whole LED Strip Flickers
If the entire strip is flickering at the same time, the problem is likely to be affecting the system as a whole.
Start by checking the power supply. You may have an overloaded or failing LED driver struggling to provide stable power to the strip. Also check the main power connection, along with any dimmer or controller connected between the driver and the strip.
Also check if you have the correct voltage for your driver. Review the total capacity as well, and check if your strip’s total wattage still fits the driver.
Recap: For a whole-strip run flicker, start at the source and work your way up toward the strip.
Only Part of the LED Strip Flickers
When only a section flickers, then the problem may be more localised.
First, check where the flickering begins (the side closest to the power supply).
-
Is there a connector or join nearby?
-
Has a section of tape been cut or bent?
-
Could there be a damaged solder point or loose connection?
Sometimes it’s not a matter of “my whole strip light is flickering,” but more of a “something is wrong around this section,” and all you need to do is know where to look and what to look for.
For longer installations where the flickering is at the farther end of the strip, you might want to consider voltage drop as the reason. This is likely the case if the point farthest from the power source is dimmer than the sections closest to it.
The LED Strip Flickers Only When Dimmed
If the strip works normally at full brightness but starts flickering when you dim it, compatibility should be one of the first things you investigate.
For a dimmable LED strip lighting to work properly, all the components (LED strip, driver, and dimmer or control method) need to work together.
Your biggest clue is that the flickering appears specifically when you dim the strip. Check that the driver is designed for the dimming method you're using. Also check whether you’re using a compatible dimming controller or something random you saw a YouTuber use in their lighting installation.
The LED Strip Flickers Randomly
You’re looking at intermittent flickering. One moment the system may appear perfectly healthy; the next moment it starts misbehaving.
The likely cause?
My best bet would be loose connections, so check the strip connectors, driver terminals, controller connections, and extension cables first.
An unstable or failing power supply could also be responsible, while a damaged cable or intermittent controller connection can produce similar symptoms.
If moving a cable or connector causes the flickering to appear or disappear, that’s a useful clue.
Before inspecting or adjusting anything, switch off the power first.
The LED Strip Flickers at the End of a Long Run
If the strip is stable near the power source but flickers, dims, or changes colour further along the run, voltage drop should be at the top of your list.
As electrical current travels along a strip installation, the voltage available further from the power source can reduce or “drop”. The effect depends on the strip, system voltage, installation design, cable lengths, and power distribution.
That’s why you should always plan thoroughly before buying any components, so that you can rest assured that every piece has a role to play. It also makes it easier to source parts when you know what you need and where to find them.

8 Common Reasons Why LED Strip Lights Flicker
Now that you have identified the flickering pattern, it’s time to determine the reasons behind it.
1. The Power Supply Does Not Have Enough Capacity
Most of the time, it’s just an overloaded power supply.
Every LED strip has a power requirement, usually expressed in watts per metre. Every driver also has a capacity, expressed in watts. This is why it is crucial that you know how to calculate the power requirements for LED strip lights.
It’s simple, really. Multiply the strip’s wattage per metre by its total length, and make sure that the driver you get is above that total wattage.
Here’s the formula:
LED strip wattage per metre x total strip length = total wattage required
For example, if a strip uses 10W per metre and you install 5 metres, the total connected load is 50W.
The power supply then should not go below that 50W. In fact, it’s even recommended that you add a 10% to 20% safety margin to prevent the driver from operating at its limit all the time.
If the LED strip’s total wattage exceeds what the driver can provide, the system may become unstable and flicker.
Different strips can have very different power requirements. So, always check the specifications or product description. Never rely on an estimate!
2. The LED Strip and Power Supply Have the Wrong Voltage
This one doesn’t need any math equation, just mindfulness.
The golden rule of powering any LED strip light is to always match the strip’s voltage with the driver’s voltage (or vice versa):
-
12V LED strip → 12V power supply
-
24V LED strip → 24V power supply
You might confuse wattage with voltage. These are very different things. Wattage is the measure of the total electrical power used or produced, while voltage is the measure of electrical pressure.
Points to remember:
-
Using the wrong voltage can cause poor performance and may damage the lighting system.
-
Do not assume that because two products are both described as “LED strip lighting”, they can automatically share the same power supply.
3. A Loose or Poor Connection Is Interrupting the Power
Connection points can become “weak links” in an LED strip run if they loosen or are otherwise compromised.
Check the LED strip connectors, strip-to-strip joins, driver output terminals, controller connections, and extension cables. Those are the points that can cause issues.
What does a loose connection do?
You may notice the lights flicker when you move a cable or apply pressure around a connector. The lights may not fail completely, but the loose connection may cause the strip to flicker intermittently.
Before inspecting, tightening, or adjusting electrical connections, always switch off and isolate the power. If the loose connection is in the mains wiring, have a qualified electrician fix it.
4. The Dimmer Is Not Compatible With the LED Driver
Adding a dimmer controller is cool… until it starts causing problems for the whole setup. The common issue is compatibility.
Here’s what a typical dimmable system looks like:
Power source → LED driver → dimmer/control method → LED strip
And each part needs to be compatible with the others. If even one part isn't compatible, the whole system fails.
An indication that the dimmer might be the source of the problem is when the strip operates normally at full brightness but flickers when the brightness is reduced. When this happens, check the dimmer and the driver first.
This is already a given, but the driver needs to support the relevant dimming method, while the dimmer needs to be suitable for the connected lighting load.
So, yes. Maybe hold off on replacing the strip first, as that won’t solve the problem.
5. The LED Controller Is Causing the Flicker
If you have a CCT, RGBW, or RGB LED strip light installed, then part of the system is the LED controller. This means that if they flicker, there’s an additional component to investigate.
If connected incorrectly, overloaded, or incompatible with the strip, the controller might cause flickering.
Start by checking the connections between the controller, driver and LED strip. Then see whether the flickering changes when you switch between colours, modes, or brightness levels.
For example, if the strip works correctly in one mode but flickers when certain colours are selected, that behaviour may point towards the controller, connections, or compatibility.
The first step in preventing this is making sure the controller is compatible with the entire LED strip lighting system.
6. Voltage Drop Is Affecting a Long LED Strip Run
A common enemy for long LED strip runs is voltage drop.
This phenomenon happens because the available voltage drops the farther the electricity travels away from the power source. Think of it as flowing water. The farther it is from the source, the slower it becomes.
The symptoms you need to look out for:
-
Reduced brightness towards the end of the strip
-
Flickering at the furthest point
-
Uneven illumination
-
Colour differences on RGB, RGBW or CCT systems (usually at the farther end)
The solution is not simply to swap to a more powerful driver. You still need to use the same voltage, anyway, so there won’t be any significant difference, if any. The best solution is to plan your LED strip run properly.
Manufacturers will give you a recommended maximum run length for their strips. Follow it faithfully. Saying, “One more metre won’t hurt,” is still adding an additional one metre beyond the maximum length.
Depending on the system, you may need to divide a long installation into separate runs. There’s no shame in using multiple LED strips, each with its own power supply, to make up your entire lighting scheme.
7. The LED Driver or Power Supply Is Faulty
Sometimes the driver itself is the problem.
There’s no escaping it. Power supplies can become unstable or fail over time. A faulty driver may cause the entire strip to flicker, switch off unexpectedly, or begin flickering after the lights have been running for a while.
Another useful clue is when you have multiple LED strips connected to the same driver and all of them are flickering. You can literally trace the fault back to the root cause.
If you have a compatible replacement driver lying around, you can use it to test the system. If no flickering occurs, then the driver was the issue all along.
Some drivers are directly connected to the mains circuit. If you’re unqualified to do the wiring work, seek help from a qualified electrician. No flickering is worth more than your safety, after all.
8. The LED Strip Itself Is Damaged
If you’ve checked everything else from the mains connection up to the controllers (if any) and everything checks out, then the LED strip itself may have developed a fault.
Physical damage can occur during installation or afterwards. Damaged copper pads, incorrect cutting, excessive bending, and damaged solder points can affect the strip's electrical connection and cause flickering.
To prevent damage from external impacts and dust buildup, using aluminium profiles is recommended.
Moisture is also a concern, especially if you install an LED strip light that isn’t rated for the environment. For outdoor installations, make sure that your strips and all the other components are rated for outdoor use.
If there’s localised flickering happening, meaning the same section repeatedly flickers while the rest of the strip operates normally, inspect that area carefully. Chances are, you can replace only the affected section using appropriate connectors, and the flickering is solved.
After all, LED strips are cuttable.
LED Strip Flickering Troubleshooting Table

Use the table as your starting point, then follow the relevant troubleshooting section above and below. The aim is to identify the most likely cause before replacing components unnecessarily.
How to Fix Flickering LED Strip Lights Safely
Now let’s walk through the details on how you can fix your LED strips.
Step 1: Turn Off the Power Before Checking Connections
Safety comes first. Switch off and isolate the power before inspecting or adjusting electrical connections. If you want to be extra careful, switch off the mains connection.
Do not work on exposed mains wiring if you are not qualified to do so. Instead, use a qualified electrician.
Step 2: Check the LED Strip Voltage
Confirm your LED strip’s voltage. A 12V strip needs a suitable 12V power supply, while a 24V strip needs a suitable 24V power supply.
Never mix both.
Step 3: Check the Power Supply Capacity
To determine the required power supply capacity, calculate the total connected load by multiplying the strip's wattage per metre by its total length.
If you have multiple strips connected to a single driver, add the total connected load of each strip. Add a 20% safety margin to ensure proper performance and prolong your driver's life.
Step 4: Inspect All Connections
Connectors, terminals, controllers, extension cables, and strip-to-strip joins can become weak points if they’re not securely connected.
Look for loose connections, damaged cables, or poorly seated connectors. If the flickering changes when you disturb a connection, investigate that area further.
Again, switch off the power before making adjustments.
Step 5: Check Dimming and Controller Compatibility
If the system includes a dimmer, RGB controller, RGBW controller, or CCT controller, check that the components are compatible with the strip and driver.
If flickering only appears when you dim the lights or change colour, start here.
Step 6: Test the System Before Reinstalling Everything
Test the complete system before permanently fixing the strip, concealing cables, or closing access panels. It’s much easier to find faults while everything is accessible than after the entire installation has been neatly tucked away.
A five-minute test can save you from another complete rehaul.

Step 7: Replace the Faulty Component if Necessary
If testing confirms a component has failed, replace it with one that matches the LED strip and the rest of the system. Check the voltage, capacity, and compatibility requirements.
You don't want a replacement that isn’t compatible with your lighting, or you’ll just add more problems to your already-problematic lighting.
If the problem involves mains wiring, or you cannot confidently identify the fault, contact a qualified electrician.
Why Do LED Strip Lights Flicker When Dimmed?
Flickering that occurs only while dimming is a useful symptom because it narrows your investigation considerably. Think of it as a blinking neon sign pointing at your dimming controller.
There are several possible reasons why the system might flicker during dimming:
-
The dimmer and LED driver are incompatible (yes, it’s not just the strips your dimmer needs to be compatible with)
-
The driver does not support the dimming method
-
The dimming range is unsuitable
-
The connected load falls outside the recommended operating range
-
The dimmer, driver, or controller has developed a fault
The important point is that dimming is a system-level issue. Meaning replacing one component without checking its compatibility with the rest of the setup can simply move the problem around.
Confirm that all your components can work seamlessly together. Also make sure that the connected load is within the driver’s capacity.
If the installation uses a controller rather than a conventional dimmer, check that the controller is compatible with the particular RGB, RGBW, or CCT strip.
Why Do LED Strip Lights Flicker After They Have Been On for a While?
Do your LED strips do this? They work perfectly when switched on but start flickering later. This presents a slightly different clue than the one above.
You could be looking at heat and operating conditions as the culprit, especially when the system has been running for some time.
An LED driver may also become unstable if it is overloaded, overheating, or beginning to fail. So, check whether it was installed according to the manufacturer's instructions. Also, make sure that it is positioned properly and has enough ventilation to avoid these problems.
If the driver is working close to or beyond its intended capacity, the system may also become unstable. That’s why it’s recommended that you allow a safety margin on its total capacity.
A poor connection can also cause problems, especially as components warm up.
But wait!
Don't assume a warm power supply is automatically faulty, since operating temperature can vary on each setup.
How to Prevent LED Strip Lights From Flickering
You know what they say, prevention is better than cure.
Choose the Correct LED Driver From the Start
Match the driver's output voltage to the LED strip, and make sure its capacity suits the total connected load. Both wattage and voltage need to be correct.
Avoid Overloading the Power Supply
Choose your driver AFTER you have determined the total wattage of the LED strips you’re going to connect.
If the installation changes, recalculate the load. Adding another strip can easily overload a perfectly stable setup.
Use Compatible Dimmers and Controllers
If you are using dimming, RGB, RGBW, or CCT controls, check their compatibility before connecting the system.
All components in the setup need to work together.
Plan Long LED Strip Runs Properly
Follow the LED strip’s maximum run lengths and consider voltage drop when planning the installation. Consider having separate runs and adding power feeds for a more stable result.
24V LED strips are ideal for longer runs than 12V options, as it takes longer runs for voltage drops to occur.
Use Suitable Connectors and Secure Connections
Just because it fits doesn’t make it right.
Use the right connectors and make sure strip-to-strip joins, cables, driver terminals and controller connections are secure. Poor connections are a major cause of flickering and other issues.
Test Before Completing the Installation
Finally, test the complete system before permanently mounting the strip or hiding the cables.
Check the lights at different brightness levels and, where applicable, through different colours and modes. Leave the system running long enough to confirm that it remains stable.
Basically, make sure no symptoms come up that would require another fix.

Final Thoughts: Find the Cause Before Replacing Your LED Strip Lights
Flickering LED strip lights can be annoying, but they’re often useful diagnostic clues for quickly narrowing down the cause and finding the right solutions.
So, when your LED strip lights flicker, don’t replace them with a new one right away. Check everything from the mains supply to the driver, dimmer or controller, and the strip itself.
Each type of flickering is a clue as to where the likely cause might be, so pay close attention.
Simply put, identify when, where, and how the strip flickers. That should point you towards the cause.
Once identified, replace the faulty component by making sure the replacement is compatible with the rest of the system.
But like everything else, prevention is still a better option, so getting quality products from a trusted supplier is essential.
For compatible LED strip lighting components and installation essentials, explore Simple Lighting's range to find parts and accessories that will work well with your setup.


0 comments