

More and more people are using acoustic slat wall panels. And if you haven’t jumped on the bandwagon yet, it’s not too late.
In fact, you can take it up another notch by adding lights.
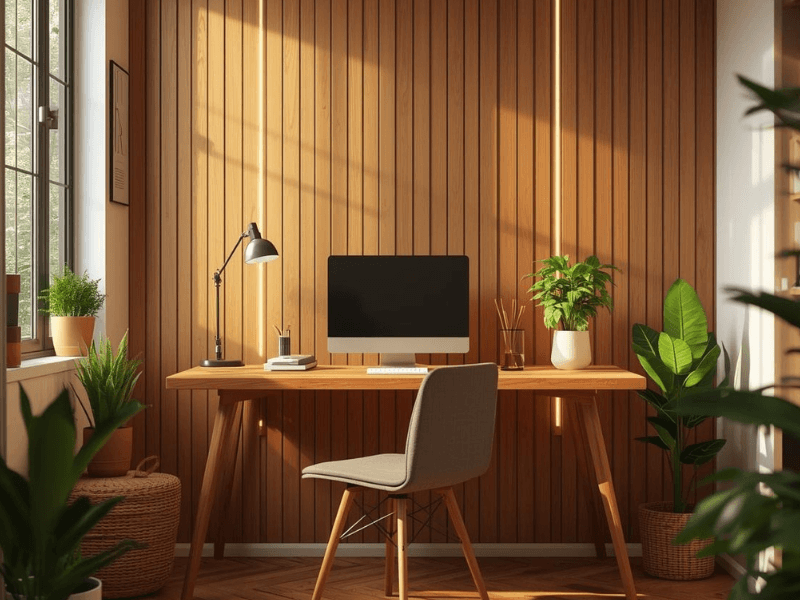
The good news is that all it takes is flexible acoustic slat panel lighting to create a clean, continuous line of light that sits neatly in the groove between the slats.
In this short guide, we’ll walk you through the process, from planning your lighting layout to fitting and connecting the light to the driver. Read on if you’re planning to DIY this installation.
What Is LED Neon for Acoustic Slat Panels?
Think of the classic neon lights, but LED. And instead of the rigid, brittle glass tubes, they’re made of flexible silicone or PVC, which means you can bend them, twist them, and even “accidentally” drop them, and they’ll be fine.
Plus, they’re specifically made for your acoustic slat wall panels.
Its advantage? The continuous line of light it can produce (no visible LED dots from standard LED strip lights), without needing an aluminium profile.
Its flexibility makes it suitable for following the long, narrow grooves of acoustic slat wall panels. Installed this way, the light looks built-in rather than added on later in the construction.
What You'll Need
Before installation, gather everything you’ll need to avoid delays and back-and-forths:
-
Flexible LED acoustic slat panel lighting
-
A compatible 24V LED driver
-
Low-voltage cable
-
Measuring tape
-
A sharp cutting tool suitable for the neon
-
Basic fixing equipment, depending on your panel system
-
Connectors if your installation requires them
The most important part is getting the electrical side right. But let’s not get ahead of ourselves. Let’s take this one step at a time, starting with…
Step 1: Decide Which Grooves You Want to Light
All great lighting projects start with a plan.
This might already be obvious, but you don’t need to light every groove in your acoustic slat wall. In fact, selecting just a few slats to light is what makes this appealing.
Start by measuring the height and width of the panelled area. Then, for the grooves, you might choose:
-
Every second or third groove for a more spaced-out effect
-
Just two to three slats on each side of the TV or media unit
-
Half slat or not illuminating the whole floor-to-ceiling length of the slats
Deciding which grooves you’ll light will help you plan how to hide the cables during installation and where to position the LED driver.
Planning this early helps you avoid discovering halfway through the installation that your power connection is on the wrong side of the wall.
Step 2: Measure the Neon Run and Plan the Cable Route
Here’s a rule we live by when it comes to lighting: Measure twice, cut once. Don’t just take note of which groove you’ll install the lights in. Also note their length and how long your neon strips need to be.
Yes, measure each one. I know it’s easy to assume each groove will be the same length, but you’ll be shocked to learn that even a slight deviation can mess up your installation.
Lighting several separate grooves may also mean you’ll have multiple runs of the neon slat lights rather than one continuous connection. Depending on the layout, each run could connect to a single driver, or you may need several.
Either way, the right measurements will help you install it cleanly.
Another important consideration is how the cable routes will be. For example, Simple Lighting’s LED neon slat lights come supplied with a one-metre lead ending in bare red and black wires, with no plugs attached.
These wires connect to the LED driver, so you need to think not only about keeping the cables neat and discreet, but also about where to position the driver so it doesn’t affect the finished look.
Common options for discreet cable management are routing the cable behind the acoustic panels or using an aluminium profile. Both options effectively prevent “spaghetti wires” that can undermine an otherwise perfect installation.

Step 3: Cut the Neon to Length
That’s right. Like LED strips, LED neon slat lights can be cut to the required length. Look carefully along the neon strip for the marked cutting points. These indicate where you can safely shorten the fitting.
Don’t cut anywhere else!
If your required length falls between two marked cutting points, use the nearest suitable point and account for the small difference in your installation.
I recommend taking your time here. A clean, accurate cut will ensure good performance down the line. If you need to make joins or changes of direction, suitable neon flex connectors can keep the installation looking clean and professional.
Step 4: Fit the Neon Into the Slat Groove
Now for the main event.
With your sections measured and cut, position the flexible neon inside the groove between the acoustic slats.
You want the neon to sit neatly in the channel, following the groove's line without twisting or bulging out. Work along the length gradually rather than forcing the entire section into place at once.
Depending on the slats and the neon lights you have, the installation might still need additional support. An aluminium profile can help. This should provide a more secure installation while keeping the whole setup clean.
Step 5: Connect the Neon to a 24V LED Driver
This is the step you should never mess up.
The example we’ve been using in this guide operates at 24V. This means it must connect to a compatible LED driver, so the driver must also be rated for 24V.
Of course, you also need to measure the total wattage, and the driver should be able to handle it. If you are powering multiple runs from one driver, add their combined load before selecting the driver.
Pro tip: Add at least a 10% to 20% safety margin to your driver’s capacity to account for surges and prevent it from running at its limit all the time.
The low-voltage side connection can be done by anyone who likes to DIY. However, for the mains connection to the LED driver, if you’re not a qualified electrician, don’t even try. Let the professionals handle it.
Safety first!
Step 6: Test Everything Before Finishing the Wall
Now that everything’s in place, you might be in a hurry to finish the whole installation. Don’t be.
Before securing anything, test everything first. Check that:
-
Every section illuminates correctly
-
There are no dark sections
-
The neon is sitting properly within the grooves
-
Connections are secure
-
Cables are neatly routed
-
The driver is positioned appropriately
-
The lighting is operating as expected
Discovering problems now is better than finding them later once everything is fixed in place.
If the issue is in the mains connection, stop and get help from a qualified professional.
LED Neon Slat Wall Installation Checklist
A few things to check before you start:
The groove size: Make sure the neon fits the space between your slats.
The total length: Measure every illuminated section and account for all of the runs you intend to install.
The cutting points: Cut the neon only where it is marked as cuttable.
The driver: Confirm that your 24V LED driver can handle the total load of your installation.
The cable route: Decide where the supplied 1-metre lead and any additional low-voltage cable will go.
Access to the driver: Make sure the driver remains accessible for maintenance or replacement.
The mains connection: Leave the mains side of the driver installation to a qualified electrician. If you are, then install away!

Lighting Acoustic Slat Panels Without the Headache
Adding LED neon slat lights to your acoustic slat wall panels is pretty straightforward. The trick, though, isn't in the fitting itself, but in the planning.
Measure your panels, decide which grooves you want to illuminate, plan your cable routes, cut the neon only at the marked points, and make sure your 24V driver has enough capacity for the installation.
Sort all those out and your acoustic wall panel lighting is golden.
If you’re ready to transform your walls, check out Simple Lighting’s range of slat panel lighting for options that fit your project.


0 comments