



So, you’ve finally decided to upgrade your kitchen lighting.
More than just a practical necessity, good lighting has become one of the biggest design features in modern kitchens.
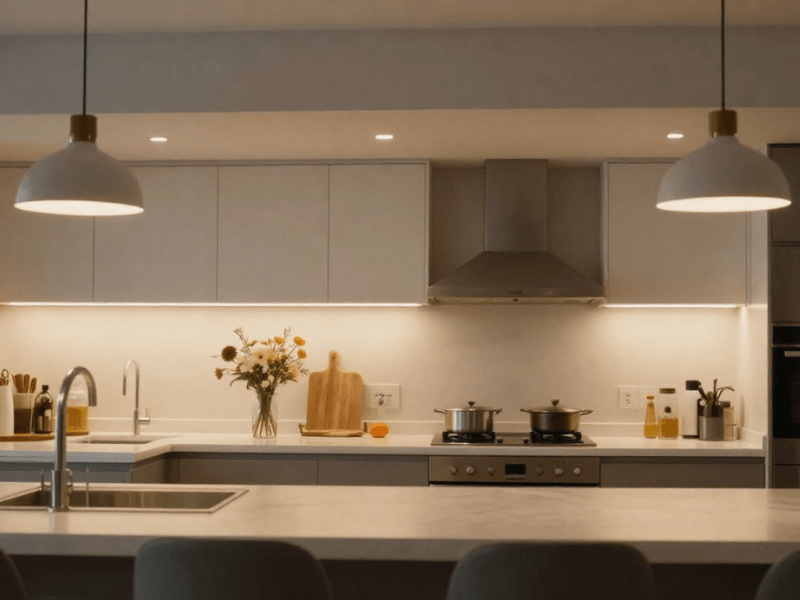
Think about it: A single strip of light under a cabinet can completely change how a kitchen looks and feels. Suddenly, worktops appear brighter, splashbacks gain depth, and the entire room takes on that luxurious showroom glow that people can’t stop praising.
That’s exactly why LED strip lights have become one of the go-to kitchen lighting upgrades. And why wouldn’t they be? They’re affordable, energy-efficient, easy to install, and capable of transforming even old kitchens without requiring a full remodel.
Better visibility, softer lighting, and sleek modern aesthetics are yours at a relatively low cost. But wait, what’s the catch? Surely there is one.
And you’re right. It’s installation.
Poor positioning, visible LED dots, messy cables, or the wrong driver, you name it. All of these can quickly turn a stylish upgrade into something that looks rushed and unfinished.
That’s why in this guide, we’ll cover everything you need to know, including:
-
Choosing the right LED strips
-
Deciding where to position strips
-
Understanding drivers and voltage
-
Installation tips
-
Cable management, and
-
Common mistakes to avoid
Some of these may seem too technical at first glance, but don’t worry. By the end, you’ll know exactly how to create clean, seamless kitchen lighting that will amaze every guest who sets foot in the space.
Why LED Strip Lights Work So Well in Kitchens
If you’re still relying on a single ceiling light for your kitchen, then you’re totally missing out.
You should realise that your kitchen, just like your living room, is a multipurpose space, which means that your lighting needs to do several jobs at once:
-
Provide enough brightness for cooking and preparation
-
Create an atmosphere for dining or entertaining
-
Enhance the space’s aesthetics
A single ceiling light can’t handle all that! Worse, they often leave shadows on worktops, leaving the space looking flat.
(Drumroll) That’s where LED strip lights shine! Literally.
Strip lights introduce layered lighting for your kitchen. This gives the space depth, balance, and a more premium look. Even minimalist kitchens benefit from the light, which highlights textures, surfaces, and architectural details.
Another advantage is improved worktop visibility. LED strips installed under cabinets directly illuminate the space that matters most in your kitchen: your worktops. Reduced shadows while chopping vegetables, reading recipes, or preparing meals? LED strips are practical lighting disguised as a design feature!
LED strips also create ambience incredibly well. Nowadays, kitchens are no longer just used solely for cooking. They’ve become social hubs, and lighting (particularly colour temperature) plays a major role in making the space as flexible as possible for each activity.
Another reason they work so well is the flexibility in application. Bulky fittings under your kitchen cabinets (and other tight spots) are a no-no. Yet LED strips can easily be installed in these places. Think above cupboards, along shelving, beneath kitchen islands, or inside display cabinets.
But this flexibility doesn’t mean you can just install LED strips willy-nilly.
The Most Popular Places to Install LED Strip Lights
One thing you need to understand is this: Different strip light placements create completely different effects throughout the kitchen.
1. Under cabinets. This remains the most common installation choice. It improves task lighting while adding a soft glow across the worktop and splashback. Practical, stylish, and suitable for almost every kitchen layout.
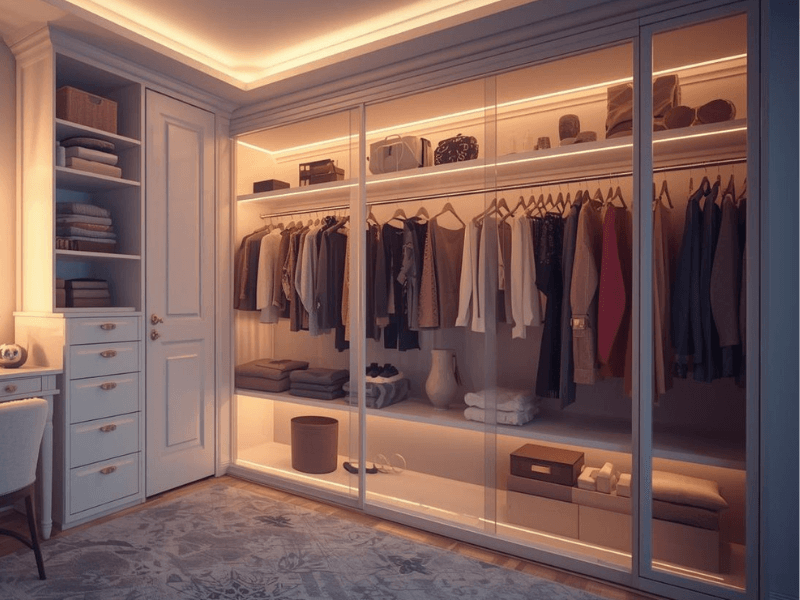
2. Inside cabinets. Want to create a more luxurious feel? Glass-fronted cabinets especially benefit from internal lighting, which highlights items inside. Got some fine china you want to show off? This is how you do it.
3. Above cabinets. Notice that dark empty space between the ceiling and your cabinet? This eliminates that. Instead of the kitchen abruptly ending at cabinet height, the soft upward glow adds a sense of space, creating depth and visual balance.
4. Kitchen islands. LED strips can be recessed beneath the island’s countertop overhang or integrated into the base for subtle accent lighting that makes the island seem to float.
5. Plinth lighting sits near floor level beneath cabinets. This creates a floating effect that looks incredibly modern.
6. Shelving and display areas. Carefully positioned LEDs add warmth and make decorative pieces on your shelves feel intentional rather than cluttered.
Choosing the Right LED Strip Lights for Your Kitchen
Just like many things in life, not all LED strip lights are created equal. Two strip lights may look identical yet deliver completely different results once installed.
That’s why knowing how to choose correctly at the beginning saves frustration later and usually leads to a much cleaner finish.
Brightness, voltage, chip design, IP rating, and overall build quality all affect the final appearance.
Standard LED Strips vs COB LED Strips
One of the biggest choices you’ll face when you go the LED strip light route is whether to use standard LED strip lights or COB LED strips.
Traditional LED strips contain individual LED chips/nodes spaced apart along the strip. When installed without a diffuser, these chips can appear as visible dots of light. Some people don’t mind the effect, especially if the strips remain hidden from direct view.
However, in premium modern kitchens, visible dots can make the installation feel cheaper.
COB LED strips solve this problem… and beautifully, might I add.
COB stands for “Chip on Board,” and these strips contain many tiny LEDs tightly packed together and coated with phosphor to create a continuous line of light. The result is smooth, dot-free illumination that looks high-end.
When to best use COB strips? They’re particularly effective in kitchens with reflective surfaces, such as glossy splashbacks, polished stone worktops, or glass cabinetry, because reflections appear softer and more seamless.
But that doesn’t mean that standard LED strips don’t have a place in your kitchen anymore. They’re a good choice for indirect lighting, and they’re typically more affordable than COB strips.
For most modern kitchen projects, COB LED strips are usually the better option if you want that clean, designer-style finish.
Choosing Between 12V and 24V LED Strips
This might sound a little technical, but the difference between 12V and 24V LED strips is actually fairly simple.
A 12V strip works well for shorter runs and smaller installations. If you’re lighting a compact kitchen or only installing up to five metres under cabinets, 12V can perform perfectly fine.
However, longer installations benefit significantly from 24V LED strips (about 10 metres).
Why? Because 24V strips reduce voltage drop.
Voltage drop occurs when the brightness gradually fades along the strip, becoming dimmer farther from the power supply. A 24V strip light handles longer distances more efficiently than 12V, keeping brightness more consistent throughout the installation.
For larger kitchens, islands, or across multiple cabinet sections, 24V is usually the smarter choice. Using 12V strips for long runs can become more costly due to the need to add additional power injection points, which can also mean a more complex setup.
Should You Choose Waterproof LED Strips?
In the kitchen, moisture, steam, splashes, and cleaning products are inevitable. This makes IP ratings important.
An Ingress Protection (IP) rating measures a product's resistance to dust and water.
But here’s the thing: not every kitchen installation requires waterproof strips. In completely dry locations, standard strips may provide easier installation and better heat dissipation. For general lighting in dry areas, IP20-rated LED strips are often sufficient.
However, areas close to sinks, hobs, or kettles benefit from additional protection. IP65 LED strips include a protective silicone coating that helps shield the LEDs from moisture and splashes. They’re especially useful beneath cabinets near sinks or cooking areas where steam and grease are more common.
The key is matching the strip to the environment. You don’t want to automatically choose the highest available IP rating for the whole kitchen since you would be spending for protection you don’t need.
Yes, higher IP strips usually cost more than standard IP20-rated ones.

Choosing the Best Colour Temperature for Kitchen LED Strips
Did you know that your kitchen can have different moods depending on the colour of the lights turned on?
Warm White LED Strip Lights
These typically range from 2700K to 3000K.
This lighting feels softer, cosier, and more relaxed with a yellow, orange, or amber hue. It’s perfect for traditional kitchens, wood finishes, and spaces designed to feel welcoming during evenings.
Warm white also works brilliantly as mood lighting, adding atmosphere to otherwise flat kitchen surfaces. These are perfect for plinth lighting, shelving, or above-cabinet illumination.
Cool White LED Strip Lights
Cool white lighting usually falls between 4000K and 5000K.
This lighting has no hint of yellow hue, but the higher Kelvin (K) ranges tend to be bluish. This creates a crisp, modern appearance with greater clarity and brightness.
Modern kitchens tend to often pair beautifully with cool white LED strips because the cleaner tone complements modern finishes like matte cabinetry, marble worktops, stainless steel, and minimalist layouts.
With cool white lighting, colours appear sharper, surfaces look cleaner, and worktops become easier to use during food preparation.
The sweet spot for everyday task lighting is natural or neutral white (4000K).
RGB and Smart LED Strip Lighting
These strips introduce colour-changing functionality into the kitchen. RGB strip lights open your choices to millions of colour combinations, so you can add bold colours perfect for statement lighting.
Plus, with smart controls, you can switch between bright functional lighting and colourful ambience depending on the occasion. Hosting friends? Set warm amber tones. Movie night? Soft blue plinth lighting adds to the immersion.
Smart lighting also lets you control your strips with smartphone apps and voice assistants. You can also dim lights remotely, automate schedules, or integrate the strips into an existing smart home system.
While RGB lighting isn’t essential for every kitchen, it’s increasingly popular in open-plan spaces that double as entertainment spaces.
Pro Tip: Not all RGB lights are smart lights, and not all smart lights are RGB lights. So make sure to check the product description before purchasing.
Tools and Materials You’ll Need
Before installation begins, it’s worth getting your ducks in a row. Gather everything you need first, as it's easy to forget something that could halt the whole process.
You don’t want to stop halfway just to go back to your local hardware store because a single L-shaped connector is missing, do you?
Here’s a checklist to keep you grounded:
-
LED strip lights
-
LED driver or power supply
-
Aluminium profiles + diffuser
-
LED strip connectors
-
Wire cutters
-
Measuring tape
-
Screwdriver
-
Adhesive clips
-
Mounting screws
-
Cable clips
-
LED controller or dimmer (optional)
Pro Tip: The most important thing to prepare here is the correct driver because the entire setup depends on it. A mismatched driver can cause flickering, overheating, or premature strip failure.
Planning Your LED Strip Light Installation
“If you fail to plan, you are planning to fail.”
The same holds true for your LED strip installations. Good planning is what separates a professional-looking setup from an uneven lighting mess.
Measuring Your Kitchen Correctly
This is the first step to any proper lighting installation, especially strip lighting, where you need to cut the strips to size.
Carefully measure every cabinet run where lighting will be installed. It’s easy to assume that the entire kitchen follows perfectly straight dimensions, but you’ll be shocked at how there are some discrepancies in measurement in some areas.
Make sure to consider corners, cabinet gaps, extractor housings, and appliances, as they can all interrupt strip runs.
Cable routes should also be planned early. You need to figure out:
-
Where will the driver sit?
-
How will cables travel between cabinets?
-
Is there access to mains power nearby?
Thinking about cable routing now prevents visible wires later.
Finally, always allow a small margin for connectors and corner joins. Cutting strips too short is surprisingly common.
Where to Position LED Strips
As I said earlier, placement dramatically affects how the light performs. Mount your strips in the wrong location, and you risk tipping the balance of your kitchen.
For the best task lighting, position strips near the front edge underneath wall cabinets. This directs light across the worktop instead of bouncing it against the wall behind.
If the strip sits too far back, it cannot effectively eliminate the shadow that your body casts from your main ceiling light.
For hidden ambient lighting effects, having the strips recessed using LED aluminium profiles works better. Installing strips slightly behind cabinet lips or light rail mouldings hides the source while allowing only the glow to remain visible. This is especially important to avoid visible LED dots.
Why Aluminium Profiles Make a Huge Difference
Speaking of aluminium profiles, they are among the most overlooked components of LED strip installations.
Technically, you can stick strips directly onto cabinets. But that leaves you with many issues to deal with: visible LED dots/hotspots, wobbly or hanging strips, and visible components.
Aluminium profiles can dramatically improve the final output of your strip lighting, eliminating all of these issues.
With aluminium profiles, you can:
-
Create cleaner straight lines
-
Improve heat management
-
Protect the strips from damage
-
Extend overall lifespan
Most profiles come with a diffuser cover that softens the light output and reduces or completely eliminates visible LED dots.
Without profiles, even expensive LED strips can look cheap and unfinished.

Step-by-Step Guide to Installing Kitchen LED Strip Lights
After all the necessary preparations, we’re finally on the fun part. And with everything lined up, installation actually becomes more straightforward.

Photo by Kelly Sikkema on Unsplash
Step 1: Clean and Prepare the Surface
Never skip surface preparation.
Kitchen cabinets collect grease, dust, cooking residue, and buildup from cleaning products. Even if surfaces look clean, “invisible” oils and dust can significantly weaken the adhesive backing.
Use a mild cleaner or rubbing alcohol to wipe down the surface. You don’t need to clean the whole under-cabinet area, just where you’re installing your strips. But hey, might as well use this chance to clean up… right? Cool.
Anyway, this simple step prevents one of the most frustrating problems later: LED strips slowly peeling away from cabinets like exhausted house lizards losing the will to live.

Step 2: Install Aluminium Profiles
If you’re using aluminium profiles (which we highly recommend), install these first.
Some profiles attach with screws, while others use adhesive mounting brackets. Whichever method you choose, ensure the profiles remain perfectly straight throughout the run… unless, of course, the bend is intentional.
Just take note that even a slight misalignment becomes noticeable once the lights switch on.
After mounting the profile, leave the diffuser cover off temporarily until the strip installation and testing are complete.

Step 3: Measure and Cut the LED Strip Lights
Most LED strips can only be cut at designated cutting points marked along the strip. So, DON’T CUT anywhere else!
Cutting elsewhere can damage the circuit and permanently disable sections.
Measure carefully before making any cuts, especially around corners or cabinet joins. If multiple runs connect, plan the joins in advance rather than improvising halfway through the installation.
For corners, you can easily bend the strips, but connectors can considerably simplify installation.

Step 4: Connect the LED Driver
Since most LED strip lights run on low voltage (remember the 12V and 24V?), you need an LED driver to convert mains electricity into the correct voltage required by the strips.
This is where compatibility matters. A 24V strip light requires a 24V driver, and a 12V strip light requires a 12V driver.
Can you mix and match? Don’t. Using a driver with the wrong voltage can cause flickering or even a malfunction.
You also need to be careful with the wattage. You don’t want to overload your driver. Add up the total wattage of all connected strips, and choose a driver that comfortably supports that load. A 3-metre strip light rated at 8W per metre needs at least a 30W driver.
As a basic rule, avoid running a driver constantly at maximum output. It’s safe to add 10% to 20% safety margin to prevent straining the driver.
This step consists of connecting wires. If you’re unsure or unqualified, it’s always safest to consult an electrician.

Step 5: Test the Lights Before Final Installation
Before placing the diffuser cover and sealing everything neatly, fully test the system.
-
Check brightness consistency across every run.
-
Look for flickering, dim sections, loose connections, or uneven colour temperature.
This is the perfect moment to catch problems while everything is still accessible. Because when everything is in place and the cables are tucked away, adjustments or replacements can be a hassle.

Step 6: Hide Cables and Finish the Installation
You can have the most premium strip lighting layout mounted in your kitchen, but if you have visible wires dangling from the setup, everything suddenly looks cheap and unplanned.
To prevent this, use adhesive clips, cable trunking, or concealed routing wherever possible to keep wires hidden and organised.
Once everything looks tidy, install the diffuser covers onto the aluminium profiles and give the entire setup one final test.
When everything is done right, the transformation usually feels immediate. Suddenly, the kitchen appears brighter, sharper, and significantly more modern without changing any cabinetry at all.
Common Kitchen LED Strip Installation Mistakes
Even simple LED strip installations can go wrong if certain details are overlooked. Here’s a list of what to avoid so you don’t jeopardise your kitchen lighting.
Choosing Cheap LED Strips
Budget options do not mean great performance. They usually suffer from inconsistent brightness, poor colour accuracy, weak adhesive backing, and shorter lifespans.
They might seem like a money-saving decision upfront, but they can quickly lead to frequent replacements and frustration later.
Incorrect Driver Sizing
An underpowered driver can cause flickering, overheating, or failure. Always calculate total wattage properly before choosing a driver.
Poor Adhesive Preparation
If your LED strips start to fall out just a few days after installation, chances are you skipped cleaning the surface. This leads to strips peeling away, especially in kitchens where heat and moisture fluctuate regularly.
Using mounting clips is a more secure way to install your strips.
Visible LED Dots
Without diffusers or proper positioning, individual LEDs become clearly visible, which can make the installation appear lower-quality and, not to mention, glaring. COB strips or diffused profiles help solve this problem beautifully.
Ignoring Voltage Drop
Long runs without considering voltage drop can result in uneven brightness. This is one reason 24V systems are often preferred for larger kitchens.
Uneven Strip Placement
Positioning is everything when it comes to lighting. Crooked profiles or inconsistent placement become surprisingly obvious once the lights are turned on. Take your time during installation because lighting highlights imperfections rather than hiding them.

Smart Kitchen LED Strip Lighting Ideas
Smart lighting is the future of LED lighting. The good news? The future is here.
With smart controls, even a simple kitchen LED strip setup can be transformed into something much more interactive and adaptable.
1. Motion sensor. Pair this with your strips to make them especially useful at night. Instead of switching on harsh ceiling lights during midnight snack missions (that are totally approved by your nutritionist), subtle plinth lighting activates automatically as you walk into the room.
2. Voice-control. This adds convenience. Create simple voice commands to adjust brightness, colour, or lighting scenes completely hands-free while cooking.
3. Dimmable scenes. These help kitchens transition throughout the day. Bright lighting works during food preparation, while softer settings create a more relaxed atmosphere later in the evening.
4. App automation. This introduces even more flexibility. You can schedule lights to activate automatically, sync them with sunset times, or create custom routines that fit your daily habits.
5. Night-time kitchen lighting has also become increasingly popular because it improves visibility without overwhelming the eyes. A gentle under-cabinet glow feels far more comfortable than suddenly blasting full ceiling brightness whenever you walk into the kitchen at night.
Are Smart LED Strip Lights Worth It?
The easy answer is yes.
The convenience alone makes smart lighting appealing. Adjusting lighting remotely or through voice commands quickly becomes something people get used to surprisingly fast.
There are energy-saving benefits as well. Automated schedules and dimming reduce unnecessary power usage. So, your lights operate only when needed and just at the right brightness (not always at full blast).
Mood lighting is another major advantage. Smart systems allow kitchens to shift personality instantly depending on the activity or time of day.
What makes people take a step back is the upfront cost. Smart systems naturally cost more than standard LED strips, particularly once controllers and integrations are included.
However, for modern kitchens focused on flexibility and ambience, smart lighting is always worth the investment.
How Much Does Kitchen LED Strip Lighting Cost?
There are many factors to consider when discussing the cost of LED strip lighting. But here’s what’s for sure: Kitchen LED strip lighting can fit a wide range of budgets.
Basic standard LED strips are usually the cheapest option, while premium COB strips with smart controls sit at the higher end.
Drivers, aluminium profiles, connectors, and accessories also contribute to the overall cost. Interestingly, some people try to cut costs on the profiles, underestimating how much they can improve the final appearance.
Unless you’re hiding your strips, it is always recommended that you use LED profiles.
Then comes the installation. DIY projects naturally reduce labour costs significantly, especially for simpler systems that use plug-and-play LED strip lighting kits. However, professional installation is still the best option for larger kitchens or installations involving complex wiring to the mains circuit.
The good news is that LED lighting remains highly energy-efficient. LED strips consume very little electricity while lasting for years. So, running costs stay low, and replacements become infrequent.
In many cases, your kitchen will look more expensive than the actual cost of the lights.

Creating a Professional Kitchen LED Strip Lighting Setup
Committing to a full kitchen renovation can be overwhelming (and costly). Luckily, there’s LED strip lighting: one of the simplest ways to modernise the entire kitchen without a complete overhaul.
Done properly, you can add a touch of luxury to your kitchen, no matter how simple it may be.
The key is planning.
Careful measuring, proper positioning, thoughtful cable routing, and correct driver sizing all make a massive difference to the final result. Knowing which type of strip you need for specific areas also helps keep the setup functional without sacrificing aesthetics.
Considering aluminium profiles and smart controls take your LED strip lighting to the next level.
Whether you’re adding subtle under-cabinet lighting, glowing plinths, illuminated shelving, or a full smart kitchen setup, LED strips offer one of the best-value upgrades for modern kitchens.
Ready to upgrade your kitchen lighting? Check out Simple Lighting to explore the latest LED strip lights collections, compare premium COB LED strips, find the right LED drivers and aluminium profiles, and discover smart kitchen lighting solutions, all catered to help you create the most stunning (yet functional) space your kitchen can be.
You can also check out more posts like this here: Kitchen Lighting Ideas: The Ultimate UK Guide.


0 comments