

Garden lighting used to mean one sad bulb and a lot of guesswork. But that’s now all in the past!
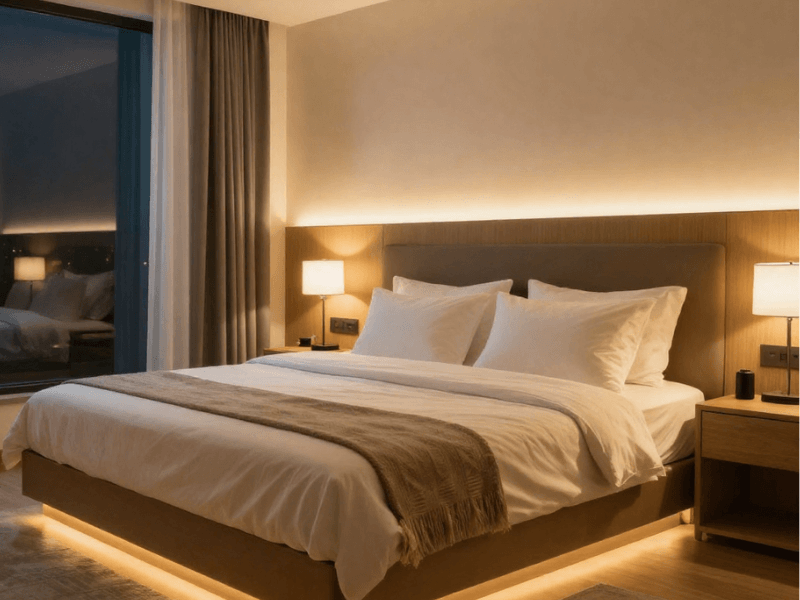
With LED strip lights, you’ll get clean lines, a soft glow, and actual control. You’ll be able to light steps, edges, and features without turning your garden into a runway.
This guide shows you what works, what lasts, and what won’t fail after one rainy week. Learn how to choose, place, and install LED strips properly. And get practical ideas that will make your garden look better and work smarter.
Why LED Strip Lights Are Perfect for Gardens and Decking
If your garden lighting still relies on one bright light and blind optimism, it’s time for an upgrade. LED strip lights fix that problem quickly.
First, they're efficient. They use less power but still give you solid brightness. So you'll get better lighting without watching your energy bill climb.
They also last longer. You won’t be swapping them every few months. Install them properly once, and they’ll just get on with it.
Then there’s flexibility. LED strips bend, wrap, and fit into places traditional lights cannot. Decking edges, railings, steps, planters. If it has a shape, LED strips can follow it.
Where they work best:
- Under handrails for a soft, guiding glow
- Along decking edges to define space
- Around planters to highlight features
- Along pathways to improve visibility
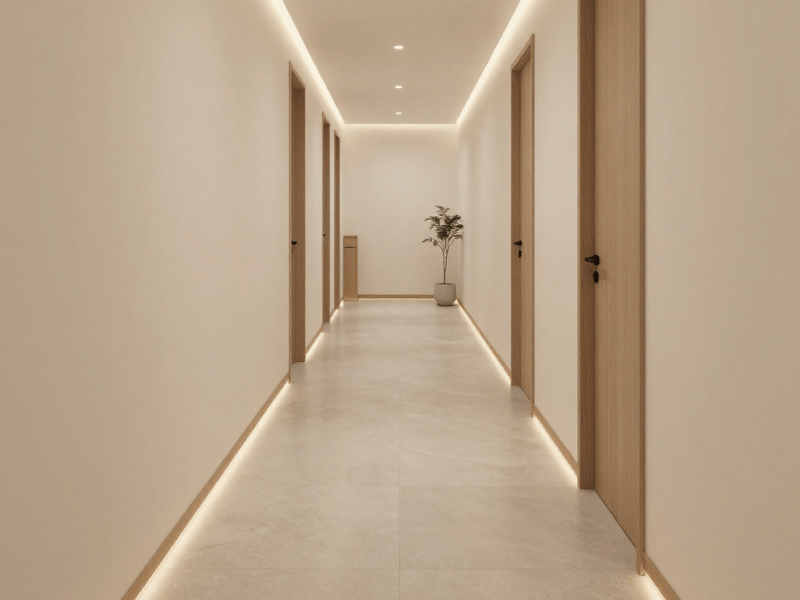
They also look cleaner. No bulky fittings. No awkward fixtures sticking out. Just smooth, continuous light that makes your garden feel intentional.
And yes, they can handle UK weather. Rain, damp, frost. The usual suspects. As long as you pick the right IP rating, they will not panic at the first sign of drizzle.
What you actually get:
- Better visibility without harsh glare
- A more polished, modern look
- Safer movement around steps and edges
You also get control. Want soft ambient lighting? Done. Need brighter light for safety? Also done.
In short, LED strip lights make your garden look better and work smarter. Without turning it into an airport runway.
Types of LED Strip Lights for Outdoor Use
Not all LED strip lights are built for the great outdoors. Some can handle rain, frost, and the occasional British mood swing. Others will squirm at the first drizzle. So choose wisely.
Waterproof LED Strip Lights
If your lights are going outside, waterproofing is not optional. It’s the bare minimum.
IP ratings to know:
- IP65 - Handles splashes. Fine for covered decking
- IP67 - Survives heavy rain
- IP68 - Fully waterproof. Built for exposed areas
Best for:
- Decking edges
- Pergolas
- Garden borders
Higher protection means better durability. It also means slightly less flexibility. That rubber coating is doing a job, after all.
Go too low on IP rating, and you’ll find yourself replacing strips faster than you replace garden furniture cushions.
Colour Temperature and RGB Options
This is where you decide the mood. Or accidentally create a light show.
Warm white:
- Soft and cosy
- Works well with wood and plants
- Ideal for relaxed evenings
Cool white:
- Bright and crisp
- Better for visibility
- Great for steps and paths
RGB strips:
- Full colour control
- Fun for parties or holidays
- Easy to overuse
A little RGB goes a long way. Unless you want your garden to look like a nightclub car park.
Stick to one main tone for a cleaner look. Your eyes will thank you.
Flexible vs Rigid LED Strips
This is about shape and structure.
Flexible strips:
- Bend around corners and curves
- Perfect for railings and decking edges
- Easier to install
Rigid strips:
- Straight and solid
- Better for clean lines
- Ideal under benches or steps
Flexible strips are forgiving. Rigid strips are precise. Choose flexible if your layout has curves. Choose rigid if you like everything neat and aligned.
Or mix both. Just do it on purpose, not by accident.
Creative LED Strip Light Ideas for Gardens and Decking
This is where LED strip lights stop being practical and start being impressive. Or at least, less “basic garden” and more “you actually planned this”.
The trick is simple. Use light to guide, highlight, and layer. Not blast everything at full brightness like a security floodlight.
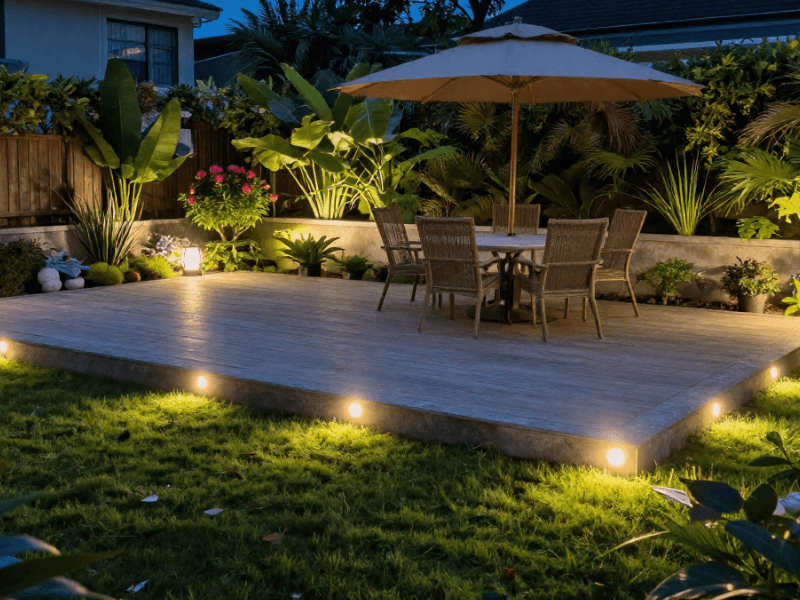
Under-Decking and Step Lighting
If your decking steps disappear at night, that is not “mood lighting”. That is a trip hazard.
Run LED strips under each step or along the edge. You get a soft glow that shows where to step without blinding anyone.
Why it works:
- Improves safety without harsh light
- Adds a clean, floating effect
- Makes your decking look far more expensive than it was
Keep the brightness low. You want subtle guidance, not runway lighting.
Fence, Pergola, and Planter Accents
Your garden has features. Or at least it’s trying to. Lighting helps them stand out.
Add LED strips along fence lines or pergola beams. Tuck them behind planters for a soft backlight.
Simple ideas:
- Highlight climbing plants or vertical gardens
- Frame seating areas without overdoing it
- Add glow behind raised beds or planters
RGB strips can work here. But go easy. One colour at a time looks intentional. Five colours at once look like a bad decision.
Pathway and Border Lighting
A dark path is fine. Until you miss a step and regret everything.
Line your pathways with LED strips to clearly define edges.
Benefits:
- Safer walking at night
- Cleaner layout with visible boundaries
- Adds depth without clutter
For better results, combine strips with spike lights or bollards. This creates layers rather than a single flat light source.
Because a single light type can look… underwhelming.
Layered and Zone Lighting
If you want your garden to look good, stop lighting everything the same way.
Split your space into zones. Each zone serves a different purpose.
Example setup:
- Decking - warm white strips for a relaxed feel
- Pathways - cooler light for visibility
- Plants or features - soft accent lighting
Layering creates depth. It also stops your garden from looking like one big, evenly lit rectangle.
You can also adjust each zone separately. Brighter where you need it. Softer where you don’t.
Edge Framing for a Clean Finish
This one is simple but effective. Use LED strips to outline edges.
Think decking borders, seating areas, or raised platforms.
Why it works:
- Defines shapes clearly
- Makes the layout look intentional
- Adds a modern, polished finish
It is a small detail. But it makes a big difference.
Done right, LED strip lighting makes your garden feel designed, not just decorated. Done badly, it looks like you installed lights in a hurry and hoped for the best.
Take your time. Plan your layout. And maybe skip the rainbow mode unless it’s actually a party.

Installation Tips for LED Strip Lights Outdoors
You can get the top LED strip lights on the market. But install them badly, and they’ll still look disappointing. Or worse, stop working after one proper rain.
Good installation is what separates “nice glow” from “why is half of it flickering”.
Planning Your Layout
Don’t start sticking strips down and hoping for the best. That’s how you speedrun wasting both time and money. Plan first.
What to sort out:
- Measure every area properly
- Map where power will come from
- Decide if you want one zone or several
Think about cable routes early. You do not want wires visible after everything is done. Unless exposed cables are your design choice. In which case… bold move.
Sketch it out if needed. Even a rough plan beats guessing halfway through.
Power Supply and Safety Considerations
Outdoor lighting is not the place to cut corners.
Get the basics right:
- Use a proper low-voltage transformer
- Choose weatherproof power supplies
- Stick to IP-rated connectors
Water and electricity are not known for getting along. So protect your connections like they matter. Because they do.
If your setup feels even slightly questionable, it probably is. Fix it now, not after it rains.
Fixing and Mounting LED Strips
Adhesive backing is helpful. It is not a miracle solution.
Outdoors, it will eventually give up. Usually at the worst possible time.
Better options:
- Mounting clips for secure hold
- Aluminium channels for protection and a cleaner finish
- Outdoor-rated adhesive for light-duty areas
Avoid sharp bends. LED strips are flexible, not indestructible.
Keep them aligned and smooth. Kinks can damage the internal wiring. And no, you cannot “just straighten it later”.
Testing and Adjustments
Test everything before final installation. Always.
Plug it in. Check brightness. Look at how the light spreads.
Things to check:
- Even light output
- Correct colour temperature
- No flickering or dead spots
Make adjustments while it is easy. Once everything is fixed in place, changes become annoying very quickly.
Also, check it at night. Daylight lies. What looks subtle during the day might feel blinding after dark.
Install it properly, and your lights will last for years. Rush it, and you will be fixing it in a few weeks.
Maintenance Tips for Long-Lasting Outdoor LED Strip Lights
LED strip lights are low-maintenance. Not no-maintenance. Ignore them completely, and they will eventually give up. Usually when you have guests over.
The good news is you do not need a full weekend or a toolbox the size of a suitcase. Just a few simple checks.
Keep Them Clean
Outdoor lights collect dirt. Dust, mud, leaves, and whatever the wind throws at them.
What to do:
- Wipe strips gently with a damp cloth
- Remove debris after storms
- Check for dirt blocking the light
Dirty strips look dim. Not “moody”. Just dim.
Check Connections Regularly
Most issues start with the connections. Not with the strip itself.
Quick checks:
- Look for loose connectors
- Make sure seals are intact
- Check for signs of moisture
Water inside a connector is bad news. It leads to flickering, failure, or both.
If something looks off, fix it early. Waiting only makes it worse.
Inspect Waterproofing and Seals
Outdoor setups rely on proper sealing. Once that fails, problems follow.
Keep an eye on:
- Cracked or worn silicone coatings
- Damaged end caps
- Gaps where water can get in
Even high IP-rated strips need occasional checks. They are weather-resistant, not invincible.
Replace Damaged Sections Quickly
If part of your strip stops working, do not ignore it.
Why it matters:
- Prevents further electrical issues
- Keeps lighting consistent
- Avoids full strip replacement later
Small fixes now save bigger headaches later.
Seasonal Check (Yes, It Helps)
Give your setup a quick check at the start of each season.
Winter and heavy rain can be rough on outdoor lighting. A five-minute inspection can catch issues early.
Look after your LED strips, and they’ll last for years. Ignore them, and they’ll fail right when you want your garden looking its best.
FAQs
Can LED strips handle UK rain and frost?
Yes, if you choose the right ones. Look for IP65 at minimum, but IP67 or IP68 is safer. Anything lower, and you are basically hoping for dry weather. In the UK. Good luck with that.
How long can outdoor LED strips run continuously?
Most quality LED strips can run for hours without any issues. They are designed for daily use. If yours overheats or flickers, something is wrong. Likely the power supply or installation, not the strip itself.
Can I mix RGB and warm-white LED strips in a single layout?
You can, but tread carefully. Warm white gives a clean, relaxed look. RGB adds colour and flexibility. Mix them without a plan, and your garden starts looking confused. Pick a main tone, then use RGB as an accent, not the main event.
Do I need a professional for outdoor installation?
Not always. Simple setups are DIY-friendly if you follow basic safety rules. But if wiring gets complicated or involves mains power, call an electrician. It costs more upfront, but it beats having to fix a bad job later. Or worse.

Strip It Right: Light Up Your Garden Properly
LED strip lights are one of the easiest ways to make your garden look like you planned it. Not just throw lights at it and pray. You’ll get better visibility, cleaner lines, and a space that actually works at night.
Keep it simple. Plan your layout. Use proper IP ratings. And maybe show some restraint with RGB. Your garden is not a nightclub. Unless you want it to. Then fair enough.
If you want lights that won’t quit after one rainy week, check out Simple Lighting. Our outdoor-ready LED strips make getting it right much easier.
You can also find more posts like this here: The Complete Guide to Garden Lighting.


0 comments