


Your kitchen lighting probably falls into one of two categories:
- Too dark to chop vegetables properly
- Bright enough to feel like an airport runway
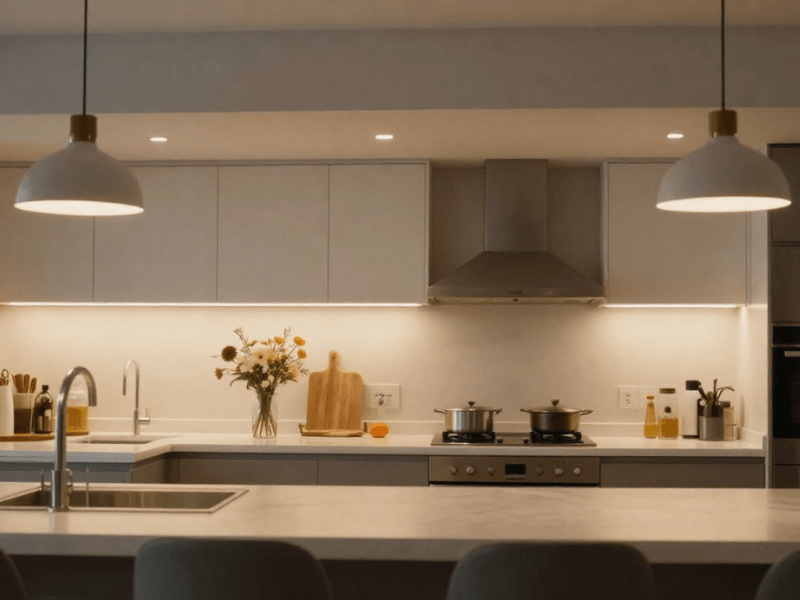
Luckily, under-cabinet lighting fixes both! It adds focused light exactly where you need it. Your worktops will look better. Your kitchen will feel more expensive. You’ll even stop accidentally seasoning your dinner with your own thumb!
Years ago, cabinet lighting felt like a proper electrical project. You needed hardwiring, transformers, and usually an electrician who vanished for three days between visits.
Thankfully, things have changed!
Modern plug-and-play LED cabinet lighting systems make installation surprisingly simple. No more complicated wiring, cutting into mains circuits, or dramatic “I think we’ve blown the fuse box” moments.
Most systems now connect straight into a plug-and-play LED driver. Some even use cut-anywhere LED strips. That means less waste and fewer awkward gaps under cabinets.
In many cases, you can install everything in an afternoon. Even if your DIY skills peak at assembling flat-pack furniture while muttering under your breath.
Here’s how to do it properly.

Why More Homeowners Are Installing Cabinet Lighting Themselves
DIY home upgrades are booming. Mostly because people realised labour costs now resemble luxury holiday prices.
Cabinet lighting became popular for a simple reason. It completely changes how a kitchen feels.
- Your worktops look cleaner
- Your cabinets stand out more
- Your kitchen instantly feels more modern
The problem was the installation. Traditional cabinet lighting systems often need:
- Hardwiring
- Electrical chasing
- Complex transformers
- Fixed-length fittings
- An electrician
Not exactly beginner-friendly, innit?
Modern plug-and-play systems changed everything!
Now, many LED cabinet lights connect directly to a low-voltage driver. The driver plugs into a normal socket. That’s it. No electrical engineering degree required.
Better still, many systems are modular and expandable. You can:
- Add more lights later
- Connect multiple runs together
- Use LED dimmers or sensors
- Cut strips to exact sizes
No more wasting half a metre of strip because your cabinet measured 87cm instead of 1m. Truly revolutionary stuff.
Why Homeowners Love Plug-and-Play Systems
No Complicated Wiring
Most systems use simple push-fit connectors. You connect lights like cables behind a TV.
Faster Installation
Many setups take only a few hours. That includes the traditional 40-minute pause, during which you stare at the instructions while drinking tea.
Cleaner Kitchen Aesthetics
No bulky fittings or messy exposed wires. Just smooth, modern lighting.
Lower Installation Costs
Electricians are brilliant. Your wallet may disagree. Plug-and-play systems reduce installation costs massively.
What Is Plug-and-Play LED Cabinet Lighting?
Plug-and-play cabinet lighting is designed to make installation simple. Instead of hardwiring lights into your home’s mains circuits, everything connects through low-voltage plug connectors.
The main component is the LED driver. With a 24V unit, you can convert mains electricity into safe low-voltage power. You can then connect your cabinet lights directly to the driver.
- No cutting mains cables
- No junction boxes
- No confusing wiring diagrams that resemble alien symbols
It’s that simple!
The Difference Between Traditional and Modern Cabinet Lighting
|
Traditional Lighting |
Plug-and-Play Lighting |
|
Requires electrician |
DIY-friendly |
|
Hardwired installation |
Plug connections |
|
Fixed lengths |
Cut-anywhere flexibility |
|
Longer install times |
Fast installation |
|
Difficult upgrades |
Expandable systems |
|
Complex wiring |
Beginner-friendly setup |
Traditional systems still exist, mostly to keep electricians busy. Modern systems focus on flexibility and simplicity instead.

Why Plug-and-Play Systems Are Ideal for DIY Projects
Minimal Tools Needed
You usually only need:
- A measuring tape
- Screwdriver
- Cable clips
- Cleaning cloth
No chasing walls with power tools like an overexcited demolition crew.
No Electrical Experience Required
Low-voltage systems are safer and easier to work with. Most connectors simply click together.
Expandable Systems
Need more lighting later? You can usually add:
- Extra strips
- Additional bars
- Sensors
- Dimmers
You don’t need to rebuild the entire setup.
Easier Maintenance
If something fails, you replace one component instead of rewiring half the kitchen.
What You Need Before You Start
Before installing anything, gather your tools and components first. Nothing kills DIY motivation faster than making five trips to the garage.
Cabinet Lighting Checklist
Here’s what you’ll usually need:
- LED under-cabinet lights
- Plug-and-play LED driver
- Measuring tape
- Cable clips
- Cleaning cloth
- Mounting brackets or adhesive pads
- Optional dimmer
- Optional motion sensor
- Optional trunking
Some systems include most accessories already. Others make you buy them separately. Check before ordering.
Choosing the Right Cabinet Lighting
Not all cabinet lighting works the same way. Choosing properly saves frustration later.
Warm White Vs Cool White
Warm white feels softer and cosier. Cool white feels brighter and more clinical.
For kitchens:
- Warm white suits traditional spaces
- Cool white suits modern kitchens
- Natural white gives a balanced look
Strip Lights Vs Rigid Bars
|
LED Strips |
Rigid Bars |
|
Flexible |
Faster to mount |
|
Great for awkward spaces |
Very neat |
|
Easy to hide |
Ideal for straight cabinet runs |
|
Best for continuous lighting |
Brightness matters |
Too dim and you gain nothing. But too bright, and your kitchen resembles an operating theatre. Look for balanced task lighting instead.
Why Cut-Anywhere LED Strips are Brilliant
Traditional strips only cut at fixed points. That often leaves awkward excess lengths.
Cut-anywhere LED strips solve this problem. You can trim them exactly where needed.
Benefits include:
- Less waste
- Cleaner installation
- Better fit
- Easier corner layouts
- More professional results
Honestly, once you use them, fixed-cut strips feel ancient.
Step-by-Step Guide: How to Install LED Cabinet Lighting Without an Electrician
Step 1 – Measure Your Cabinets Properly
Start by measuring all cabinet runs carefully, particularly:
- Cabinet widths
- Gaps between cabinets
- Corner sections
- Distance to plug sockets
Don’t guess measurements. “This looks about right” has ruined many DIY projects.
Plan Your Cable Routes
Think about where cables will run. Good cable planning helps you:
- Hide wires properly
- Avoid clutter
- Keep connectors accessible
Try routing cables:
- Along cabinet edges
- Behind trims
- Near wall corners

Avoid Dark Spots
Think about light coverage. Poor placement creates:
- Shadows
- Uneven lighting
- Bright patches
- Dark worktop sections
Continuous lighting usually looks best.
Step 2 – Clean the Surface Before Mounting
Kitchen cabinets collect grease surprisingly fast. Even cabinets that look clean may not be clean enough for adhesive mounting.
Wipe surfaces thoroughly before installing anything. Use:
- Isopropyl alcohol
- Degreasing wipes
- A dry cloth afterwards
Dirty surfaces weaken adhesive backings. It causes your expensive lights to slowly peel away like sad stickers. Not ideal.
Step 3 – Position Your Under-Cabinet Lights
Placement matters more than people realise. Position the lights too far back, and your worktop stays shadowy. But place them too far forward, and you’ll stare directly into LEDs every morning.
Not a lovely start to the day.
Front Placement Vs Rear Placement: Which are They Best For?
|
Front Placement |
Rear Placement |
|
Task lighting |
Ambient lighting |
|
Cooking prep |
Decorative glow |
|
Reducing shadows |
Display cabinets |
Avoid Visible LED Glare
Try hiding strips behind:
- Cabinet lips
- Aluminium profiles
- Diffusers
This softens the light and improves the finish.
Step 4 – Connect the Plug-and-Play Driver
This is the part that changes everything. Traditional cabinet lighting needed mains wiring. Modern plug-and-play systems don’t. That’s why homeowners can now install cabinet lighting themselves.
Why Plug-and-Play Drivers are So Simple
The driver acts as the system’s power hub. Simply:
- Plug the driver into a socket
- Connect your lights
- Turn everything on
No exposed wiring, electrical chasing, or cutting into circuits. Honestly, it feels suspiciously easy the first time!
Why 24V Systems Work So Well
24V systems offer:
- Safer low-voltage operation
- Better brightness consistency
- Reduced voltage drop
- Longer lighting runs
Perfect for modern kitchens.
Expandable Lighting Systems
Many plug-and-play systems let you:
- Add extra lights later
- Install sensors
- Add dimmers
- Extend runs easily
That flexibility matters, especially when you inevitably decide one cabinet “still looks a bit dark”.
Step 5 – Test Your Lights Before Final Fixing
Before permanently securing everything, test the full system first. Check:
- Brightness levels
- Colour consistency
- Sensor operation
- Dimmer controls
- Cable positioning
This step prevents future annoyance. Removing mounted lights later is deeply irritating. Ask any DIYer.
Step 6 – Hide and Secure the Cables
Good cable management separates professional-looking installs from chaotic ones. Nobody wants visible wires dangling under cabinets.
Use Cable Clips
Cable clips keep wiring tidy and secure. They also stop cables from:
- Sagging
- Pulling loose
- Catching on to items
Use trunking if needed. Plastic trunking helps hide longer cable runs neatly. Paintable trunking blends into cabinets well.
Route Cables Discreetly
Try hiding cables:
- Behind cabinet trims
- Along corners
- Under shelves
- Near wall edges
Take your time here. Neat cable management makes a huge difference visually.

Common Mistakes to Avoid When Installing Cabinet Lighting
Even simple installs can go wrong, usually because people rush. Or because optimism temporarily overrides common sense.
Choosing the Wrong LED Colour
Very cool white lighting can feel harsh in kitchens. Very warm lighting may feel too dim.
Natural white often works best for balanced kitchens.
Installing Lights Too Far Back
Rear-mounted lights create shadows across worktops. Front placement usually gives better task lighting.
Overcomplicating the Wiring
Many people still assume cabinet lighting needs hardwiring. It doesn’t!
Modern plug-and-play systems exist for a reason. Use them. Your stress levels will improve dramatically.
Buying Non-Connectable Lighting Systems
Cheap systems often lack expansion options. That becomes annoying later, especially when adding:
- More lights
- Sensors
- Dimmers
A connected ecosystem makes upgrades far easier.
Forgetting About Dimmers and Sensors
Dimmers improve flexibility, while sensors improve convenience. Both feel surprisingly luxurious once installed (like heated seats for your kitchen).
Why 24V Cabinet Lighting Is Better for Modern Kitchens
24V lighting systems offer several advantages over older low-voltage setups, especially for larger kitchens.
More Consistent Brightness
Longer lighting runs stay brighter and more even. Lower-voltage systems often dim towards the end.
Nobody wants a dramatic lighting fade halfway across the worktop.
Reduced Voltage Drop
Voltage drop affects:
- Brightness
- Performance
- Light consistency
24V systems handle longer runs much better.
Safer Low-Voltage Setup
Low-voltage systems are safer for DIY installation. Another reason plug-and-play systems became so popular.
More Premium Lighting Effect
24V lighting often looks smoother and more professional, especially when paired with:
- Diffusers
- Aluminium profiles
- High-quality drivers
Why 24V Systems Pair Perfectly with Plug-and-Play Drivers
The combination simply makes sense. You’ll get:
- Easy installation
- Stable performance
- Expandable lighting
- Cleaner layouts
Perfect for modern DIY projects.
Best Places to Use DIY Cabinet Lighting Around the Home
Cabinet lighting works almost anywhere, not just in kitchens.
Kitchen Cabinets
The most popular option. Perfect for:
- Cooking prep
- Task lighting
- Modern aesthetics
Pantry Shelving
It makes finding ingredients easier, especially during late-night snack raids.
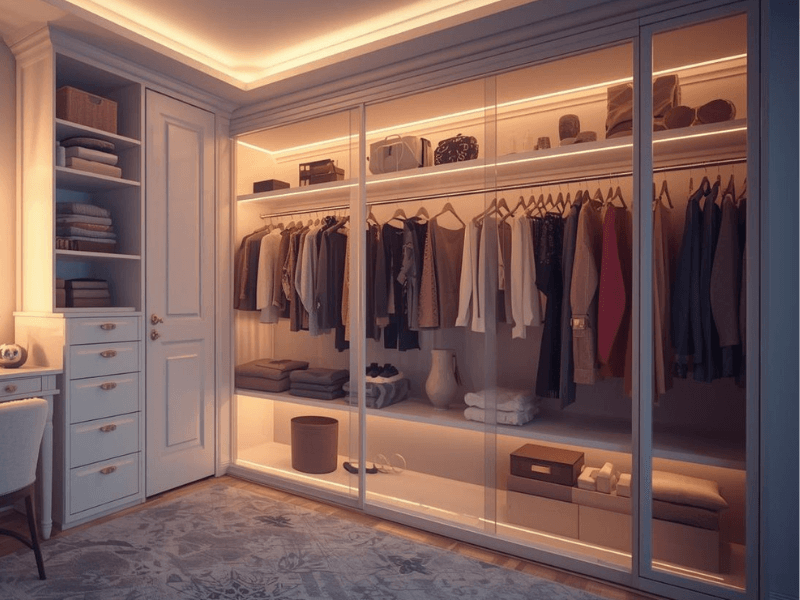
Wardrobes
Wardrobe lighting feels surprisingly premium. It also helps you stop wearing navy socks with black trousers.
Utility Rooms
Adds visibility in practical spaces, particularly useful around shelving and worktops.
Display Cabinets
Great for:
- Decorative items
- Collectables
- Glass shelving
Home Offices
Under-shelf lighting improves desk visibility nicely, especially during gloomy British winters.
Optional Upgrades That Make Cabinet Lighting Even Better
Modern cabinet lighting systems support plenty of upgrades. Most are simple to install, too!
Motion Sensors
Lights activate automatically when movement is detected. Very useful for:
- Pantries
- Utility rooms
- Night-time kitchen visits
Touch Sensors
Touch controls feel sleek and modern. They also eliminate wall switches.
Smart Lighting Controls
Smart controls allow:
- Voice control
- Scheduling
- App control
- Brightness adjustments
Very handy if you enjoy shouting at virtual assistants.
Dimmable Drivers
Dimming gives better lighting flexibility. Bright for cooking. Softer for evenings.
Aluminium LED Profiles
Profiles improve:
- Appearance
- Heat management
- Light diffusion
They also help hide LEDs properly.
Why Homeowners Prefer Plug-and-Play Cabinet Lighting in 2026
People want simpler home upgrades now, not weekend-long renovation nightmares. That’s why plug-and-play lighting keeps growing in popularity.
Homeowners want:
- Faster installations
- Flexible systems
- Less wiring
- Easier upgrades
- Cleaner aesthetics
Rising electrician costs also pushed more people towards DIY-friendly solutions. Thankfully, lighting manufacturers finally adapted.
Modern cabinet lighting now focuses on:
- Simplicity
- Flexibility
- Expandability
- User-friendly installation
Honestly, it’s how lighting should have worked years ago.

Final Thoughts – Cabinet Lighting Doesn’t Need to Be Complicated
Installing cabinet lighting used to feel intimidating. Now, it’s surprisingly manageable.
Modern plug-and-play systems remove most of the traditional hassle.
- No complicated wiring
- No hardwiring into mains circuits
- No electrician required for many setups
Cut-anywhere LED strips also make installations cleaner and less wasteful. You get a better fit with fewer frustrations.
Most importantly, you can completely upgrade your kitchen in a single afternoon. Not bad for a project that once felt reserved for professionals.
If you’re planning your own cabinet lighting setup, Simple Lighting offers:
- Plug-and-play LED drivers
- Under-cabinet lighting systems
- Cut-anywhere LED strips
- Sensors and dimmers
- Aluminium LED profiles
Everything works together properly. Which, frankly, is rarer than it should be.


0 comments