


LED strip lights are versatile and functional lighting solutions perfect for every room in your home. Because of their diversity of applications and endless varieties, people are beginning to opt for strip lights instead of conventional fixtures.
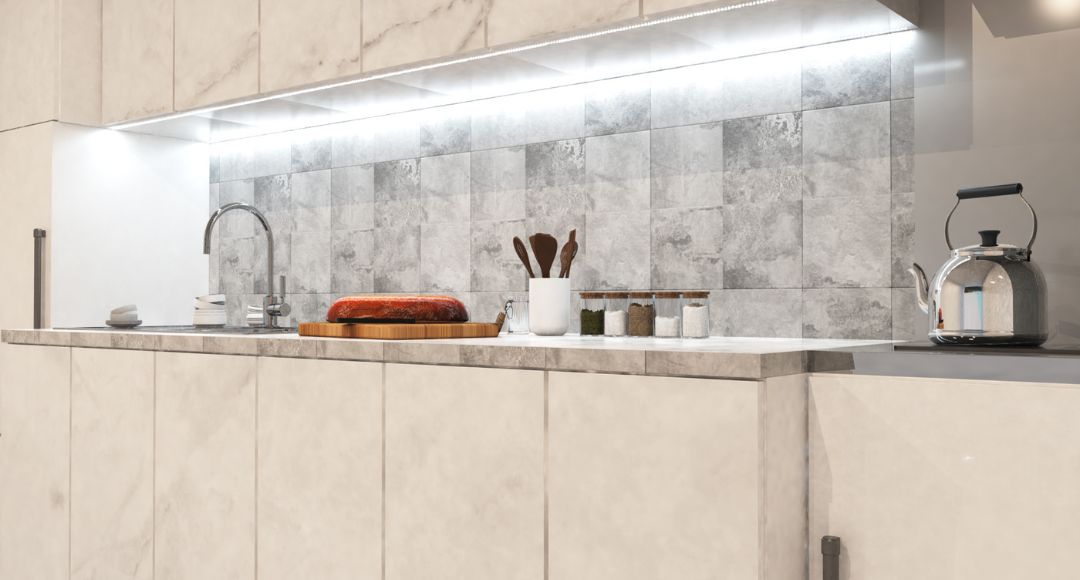
The kitchen is a specific room that vastly benefits from having LED strip lights. It’s a high-traffic area that houses many activities and tools, so sufficient illumination is necessary. Whether it’s in the kickboard near the kitchen door or under the cabinets above the counters, it transforms into whatever you need.
Reflecting on my personal experience, I also use strip lights in the kitchen because they can conveniently provide the needed brightness, regardless of the layout.
So, how do you install LED strips in your kitchen? Here’s a step-by-step guide!
- Gather all the necessary tools and equipment
- Clean the surface where you’ll install
- Drill holes for the LED aluminium profile and put the profile into the brackets (optional)
- Insert the strip light into the profile or peel off the adhesive backing and stick it to the surface
- Connect the wire of the strip to the LED controller
- If you don’t use a controller, connect the strip light to the LED driver
- Wire the LED driver to the mains circuit or add a plug to the end and plug it into an empty socket
Planning the Layout: Considerations for Optimal Kitchen Lighting
From my perspective, planning is one of the most critical steps in installing an LED strip. It will ensure that you don’t waste resources and guarantee that you have optimal lighting in the space. At this stage, you’ll know whether or not you’ll need waterproof LED light strips or how many regular strips you should buy.
The kitchen has different zones, each with its specific lighting requirements. During this phase, you must identify your particular needs based on your lifestyle and personality. It would be best to determine which areas need task lighting and where you can put accent lighting for visual appeal.
Typically, task lighting is directed towards the surface of the kitchen island and the countertops. Pendant lights or ceiling spotlights are perfect for the island, while under-cabinet strip lights are suitable for the countertops. As for accent lighting, you can install it on top of your wall-mounted upper cabinets or on the kickboards.
Preparing for Installation: Safety Measures
In addition to the tools and strip lights you’ll use, you must prepare safety equipment. Use a ladder if your installation is too high to reach while standing on the floor. Also, wear safety goggles and gloves to avoid getting electrocuted while handling the wires.
Before proceeding to the very first step, ensure that the main power supply for your kitchen is switched off. If you live with others, attach a note specifying what you’re doing. Say you’re not confident with your DIY skills. If that’s the case, calling an electrician is a safer choice for you, as they know how to mount lighting fixtures safely and correctly!
Step-by-Step Installation
Installing LED strips is pretty straightforward. It does not require high-level electrical skills and can be done as a small weekend project! So, to help you get started, here’s a simple guide to the installation process.
Step 1: Gather all the Tools
Prepare a clean cloth, soapy water, and kitchen paper. Also, you need a flat screwdriver, waterproof LED light strips (preferably for areas near water sources), an LED driver, an LED controller, and an LED aluminium profile.
Step 2: Clean the Surface
Using a clean cloth dipped in soapy water, clean the surface where you will affix the strip lights. This is a crucial step because the kitchen is exposed to different elements, and if the surface is oily or dusty, the strip lights will not adhere properly. Also, ensure that it’s dry before sticking the strip lights.
Step 3: Attach the LED Profile
If you decide to use an LED profile to make the strip light look more refined and extra secure, drill small holes for the brackets. Then, secure the profile in the brackets.
Step 4: Fit/Stick the Strip Light
Insert the strip light in the LED profile or peel off the paper from the adhesive backing and stick it to the surface you cleaned earlier.
Step 5: Wire the Strips
Feed the wires of the strip lights to the hidden location where you intend to put the LED driver and controller. Either place it inside the cabinets or above.
Step 6: Connect to the LED Controller and LED Driver
The type of LED controller you need will depend on how you want to manage your strip lights. So, to guarantee that you have the right one, check the supplier or manufacturer’s recommendations. A controller is optional for a single-colour strip light but required for a colour-changing one. Then, connect the controller to the LED driver.
Step 7: Link the LED Driver to the Power Supply
The last step is connecting the LED driver to the power supply. Here, you can wire it directly to the mains circuit to control the lights using your wall light switch or add a plug at the end of the driver and plug it into the nearest socket. After doing this, you’re done!

- COB LED Strip – No Spots, Cool, Warm or Natural White, CRI >90
- Warm White 5w LED Strip Lighting, 5 Year Warranty
- Digital, Pixel LED Strip Light, Chasing Effect – WS2811, 14.4w
Conclusion
Now that you’ve reached the end, I hope this blog gives you all the needed information on installing an LED strip light. It’s pretty quick and easy as long as you know the basics and have the materials. Just ensure that you’re always observing the necessary safety precautions, and never forget to read the manufacturer’s product guide.
At Simple Lighting, we have an extensive collection of strip lights, from regular single-coloured strips to waterproof RGB varieties. So, for your next kitchen makeover, visit our website and check out our top-quality LED strip lights!


