


So, you finally decided to add lights to your stairs. Not a simple replacement of the single dangling light bulb you currently have, but a full stair light setup.
You’ve watched countless YouTube tutorials, but most of them focus heavily on individual parts, technical wiring diagrams, and custom-built systems. Useful information for experienced installers, but a little overwhelming for casual DIY enthusiasts like yourself.
You just want a stylish, safe, and practical staircase lighting solution. But there’s a lot of research to be done just to get all the compatible components.
Why does stair lighting need to be that hard?
Thankfully, there's a much easier option: Complete stair light kits.
These take much of the guesswork out of the way by providing compatible components designed to work together. Instead of sourcing each item separately, you get a complete kit that’s ready to install.
In this stair lighting installation guide, we'll walk through:
-
How stair lighting works
-
What equipment will you need
-
Important planning considerations
-
A simple step-by-step overview of LED stair light installation
-
Some common mistakes you'll want to avoid along the way
By the end of this guide, you’ll be able to understand how to install stair lights with confidence, whether you’re renovating, upgrading, or building a new one.
Why More Homeowners Are Installing LED Stair Lights
Remember the time when illuminated staircases were considered a luxury feature found mainly in hotels and high-end properties? Now they’re much more accessible and affordable, thanks to the rise of LED lighting.
Stair Lights are Practical
Understandably, many homeowners add lighting to their stairs after being inspired by the sophisticated look of luxury hotels, modern apartments, and architectural show homes.
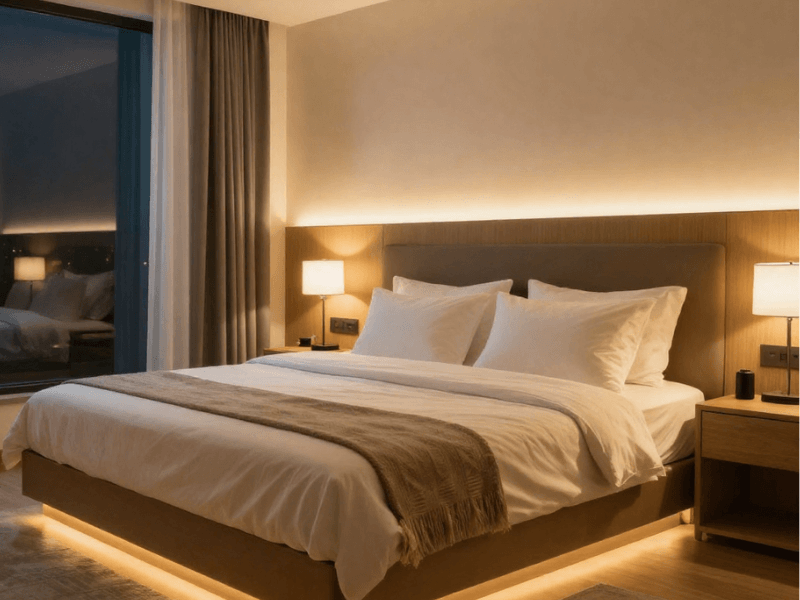
You’d be a rare case if you didn’t like the soft lighting running along a staircase. This gives it a premium atmosphere and transforms a functional feature into a striking design element.
But even so, one of the biggest reasons for their popularity is safety. Stairs can become difficult to navigate in low-light conditions, particularly at night, or when positioned without natural light during the day.
When positioned well, stair lights can help define each step, reducing the risk of slips and trips.
Smart home trends have also played a major role in this popularity. More people are integrating automated lighting into their homes, and motion sensor stair lights fit perfectly into this lifestyle.
Someone approaches the stairs (from below or above), and the lights automatically turn on. That’s not magic. Those are well-placed sensors.
Property and Energy Conscious Benefits
Simply put, stair lights add to the property's appeal. In general, modern LED lighting upgrades often enhance a home's overall presentation, and LED stair lights are no exception.
They help interiors feel more contemporary and thoughtfully designed. If the interior is perceived as luxurious, people will associate an equivalent price with it.
Then there's efficiency. LED technology uses far less energy than older lighting options, such as incandescent and halogen, while delivering excellent brightness. LEDs also last significantly longer, ranging from 25,000 to 50,000 hours.
In other words, stair lighting is practical as it is stylish.
What Is a Stair Light Kit?
You know how you need to look for individual lighting components, such as the fitting, cables, drivers, etc., when installing LEDs like LED strip lights?
With a stair light kit, you don’t have to go through all that hassle and risk of getting incompatible parts. It is a complete lighting package designed specifically for staircase installations.
A typical stair light kit may include:
-
Stair lights
-
Connectors
-
Installation accessories
-
Mounting components
The exact contents can vary depending on the design and manufacturer, but the goal remains the same: making installation simpler and more efficient.
With these kits, a big chunk of the planning and installation process is eliminated. It’s practically a plug-and-play option for both DIY and professional installers alike.
Why Choose a Complete Kit Instead of Buying Components Separately?
It's certainly possible to source individual parts. But why bother when complete kits offer several advantages?
Guaranteed compatibility: All included components are designed to work together (a.k.a., each one is compatible), reducing the risk of ordering incompatible products.
Faster installation: With fewer decisions to make and fewer components to source, projects often move much more smoothly. There’s no need to wait for that one component to arrive tomorrow, only to get cancelled to next week.
Cleaner finish: Systems designed as complete solutions typically deliver a more professional-looking result.
Reduced risk of mistakes: You don’t need to blame yourself or anyone for getting the wrong voltage or total wattage of the driver.
Simplified planning: Everything is organised into one package, making budgeting and project management much easier. Other specifications, such as length and width, are also predefined, so you know what to expect.

Planning Your Stair Light Installation
Proper planning is one of the most important parts of any LED stair light installation. (Or any lighting installation, really.)
Spending a little extra time preparing can make a huge difference to the final result. Here are some things you can do:
Decide Where the Lights Will Be Positioned
The location of your lights will have a major impact on the overall appearance of the staircase.
Wall-mounted stair lights: Installed in the wall beside the staircase, these provide a clean, elegant look while casting light across the steps.
Side-mounted installations: Lights positioned directly into the side of the staircase can create a sleek, contemporary effect and clearly define each tread. Popular fittings used are strip lights.
Recessed applications: Recessed stair lights sit flush with the surface, typically the wall beside the stairs, producing a minimalist finish that works particularly well in modern interiors.
Each option creates a slightly different visual effect, so it's worth considering your home's style and your preference before making a decision.
Determine the Number of Lights Required
You definitely don’t need just one light source above the stairs, but you might need one for each step. There are several factors affecting the number of stair lights you need:
-
Staircase length
-
Number of treads
-
Desired lighting effect
-
Brightness level
Some homeowners prefer a light on every step for maximum impact. Others choose fewer fixtures to create a softer, more subtle appearance.
As a general rule, the longer the staircase, the more lights you'll need to achieve balanced illumination.
Choose Your Colour Temperature
Colour temperature plays a significant role in setting the atmosphere of the staircase area.
Warm White: Add this light tone to create a cosy and welcoming feel. It's often best suited to traditional homes, timber staircases, classic interiors, and ambient lighting schemes.
Cool White: This tone creates a brighter, more contemporary appearance. It's commonly used in:
-
Modern homes
-
Minimalist interiors
-
Architectural designs
-
Contemporary staircases
Cool white lighting is also perceived as brighter than warm lighting, so if that’s an important factor for you, then go for this colour temperature.
Pro Tip: Use the same colour temperature as the other rooms, especially those next to the stairs, to ensure your stair lighting complements the rest of your home's design. This also adds to the feeling of continuity and coherence.
Tools You May Need Before Installation
You should not install any stair lights without first gathering the necessary tools.
Requirements will, of course, vary depending on your staircase construction and the type of stair light kit you're using, but common tools include:
-
Tape measure
-
Pencil
-
Drill
-
Hole saw (if needed)
-
Screwdriver
-
Cable clips
-
Voltage tester
Having everything ready before installation starts can help you avoid a stop-and-go operation, making the process smoother and more efficient.
How to Install LED Stair Lights Step by Step
Of course, not all staircases are built the same, so installing your lights might differ slightly from how I install mine, but the following overview explains the general process for installing stair lights.
Step 1: Mark Out Light Positions
Start by carefully marking where each light will be installed. This is part of the planning process, and consistency is essential here.
Even spacing helps create a balanced appearance and ensures the lighting effect looks intentional. Random placements tend to look unfinished and cluttered.
Take measurements carefully and double-check alignment before making any permanent modifications (especially for recessed lights).
For better positioning, you can even test how the lights will look. The goal is to minimise shadows and create more uniform illumination across the staircase.
Step 2: Prepare Mounting Locations
Recessed installation will require additional work to prepare the space, as it may involve creating openings for the light fittings.
Surface mounting is usually easier, as preparation typically involves ensuring that the mounting areas are clean, level, and suitable for installation.
This is also the ideal stage to determine the power source location and begin preparing cable routes.
Planning ahead here can save considerable time later in the project.
Step 3: Run the Wiring
Installing lights means dealing with cables. There’s no escape from that. That’s why the goal is always to keep wiring as discreet as possible while maintaining accessibility where required.
Common approaches include:
-
Running cables behind walls
-
Concealing wiring beneath staircase structures
-
Using existing service voids where available
Nothing screams “premium” more than clean cable management.
Step 4: Install the Stair Lights
Now you’re ready to install the stair lights. Depending on the type of lighting you’re using, this may involve:
-
Recessing fixtures into prepared openings
-
Securing surface-mounted fittings
-
Attaching mounting brackets
Ensure that each light is aligned consistently with the others.
Step 5: Connect to the Driver
Once the lights are in position, they can be connected to the supplied LED driver according to the manufacturer's instructions. The kit should come with the right wattage capacity and voltage rating, but there’s no harm in double-checking.
The driver is the central component powering the lighting system.
Always follow the installation manual provided with your chosen stair light kit and seek professional assistance where required.
Step 6: Test the System
Just because everything is in place does not 100% guarantee that everything will work properly. So, make sure to test the system thoroughly before completing the lighting project.
You can check for:
-
Consistent illumination
-
Correct operation
-
Uniform brightness
-
Secure connections
This is the perfect opportunity to make any final adjustments before finishing the surrounding surfaces.
Step 7: Add Motion Sensors (Optional)
Many homeowners choose to enhance their installations with motion-sensor stair lights. And, frankly, I don’t see any reason why you should not.
These sensors automatically activate the lighting when movement is detected nearby. That means that you get to enjoy:
-
Hands-free operation (no more physical switches)
-
Improved convenience (comfortable and automatic)
-
Enhanced safety (you get light when you need it most)
-
Reduced energy usage (lights only operate when needed)
If you’re not going to add motion sensors for yourself, add them for the children and older family members in your household. They’ll be sure to appreciate the added layer of safety.

Photo by Tim Kelly on Unsplash
Common Stair Light Installation Mistakes to Avoid
Straightforward lighting does not guarantee immediate success during installation. That’s because people tend to make these common lighting mistakes:
Uneven Light Spacing
Inconsistent spacing may be an attention-grabber for onlookers, but for the wrong reasons.
Lights that are too close together in some areas and too far apart in others can make the staircase appear unbalanced. You can avoid this by following Step 1 to a T.
Installing Lights Too High or Too Low
You’re sacrificing both appearance and performance when you don’t position your stair lights properly.
Lights installed too high may fail to illuminate the steps effectively, while lights installed too low may create unwanted shadows or an undesired visual effect
Finding the correct placement early in the planning stage is essential.
Choosing the Wrong Colour Temperature
Warm white and cool white each create unique atmospheres, so it's important to consider the overall interior design before making a decision.
It doesn’t matter if you have a stunning staircase design if the lighting’s tone doesn't match.
Forgetting Future Maintenance Access
LED lights may require less maintenance and have a lower replacement frequency than traditional lights, but wear and tear are real, even for LEDs. So, access to important components should still be considered.
For example, the LED driver should remain reasonably accessible in case servicing or replacement is ever required.
Planning for future access now can prevent unnecessary complications later.
Not Planning Cable Routes in Advance
Poor planning can result in visible wiring, spaghetti wires, and poor aesthetics. Taking time to map cable routes before installation begins usually leads to a cleaner final result.
Should You Install Stair Lights Yourself or Hire an Electrician?
The answer is… It depends.
You should consider two things: the complexity of the installation and your level of experience.
When DIY Installation May Be Suitable
Consider DIY installation when:
-
You're already carrying out renovation work
-
Wiring routes are easily accessible
-
You're using a straightforward stair light kit
-
You have basic electrical knowledge
-
The installation is relatively simple
Many modern kits are designed to make installation easier and more approachable for homeowners. Use those if you’re really looking to DIY your stair lights.
When an Electrician May Be Recommended
Professional installation is often the better option when:
-
New electrical circuits are required
-
Major renovations are taking place
-
Structural alterations are involved
-
Building regulations need consideration
-
You're unsure about any aspect of the electrical work
Take note that a qualified electrician can ensure the installation is completed safely and in accordance with applicable regulations.
Why Stair Light Kits Make Installation Easier
If you can make it simple, why choose complicated? This is the appeal that complete stair light kits bring to the table. Also, the reason why they’re increasingly popular.
Instead of piecing together multiple components from different suppliers, everything is designed to work as part of one coordinated system.
This way you get:
-
Reduced planning requirements
-
Compatible components
-
Faster installation
-
Cleaner results
-
Simplified purchasing
-
Modern design options
Lighting kits are the practical and efficient choice if you’re looking for a polished finish without unnecessary complexity.

Explore Our Stair Light Kits
Upgrading an existing staircase? Planning a new build? The right stair light can make all the difference.
Simple Lighting has a variety of collections that include:
-
Modern staircase lighting designs
-
Various finish options
-
Warm white and cool white choices
-
Motion sensor compatibility
-
Solutions for renovations and new builds
And, of course, everything is made with high-quality LED technology.
Looking for subtle ambience or going for bold architectural effects? There's a kit to suit virtually every staircase style.
Browse our full Stair Light Kit collection today and discover how easy it is to transform your staircase into a stunning design feature.
Transform Your Stairs with Confidence
Installing can be a breeze with the right planning, thoughtful positioning, and, of course, a quality stair light kit. Get these three figured out, and you’re set to achieve professional-looking lighting for your stairs.
Whether your goal is improved safety, a more luxurious appearance, or enhanced convenience with motion-sensor stair lights, modern LED systems offer an effective and energy-efficient solution.
The key to creating a stunning staircase is preparation.
-
Plan your layout carefully
-
Select the right colour temperature
-
Avoid the common installation mistakes
If you’re ready to take the first step (final pun), explore our full range of stair light kits and find the perfect solution for your next staircase lighting project.


0 comments