


You already used high-quality LED strip lights, but why does your setup still appear unfinished and a bit messy? How do other LED strip installations achieve an effortlessly sleek and high-end look? The secret?
It isn’t just in the quality of the LED strip; it’s in how it’s installed. That’s where LED strip channels, also known as LED profiles, come in.
These clever aluminium housings transform a simple roll of LED tape into a refined, professional lighting feature.
They’re great for three things: protecting your LEDs from damage, improving heat management, and creating beautifully diffused lines of light that enhance the aesthetic of any space.
You better grab a notebook, because in this guide, we’ll break down everything you need to know about LED strip channels and profiles.
Our goal?
To help you understand how these small accessories make a big difference and give you the confidence to plan and install your own flawless lighting setup like a pro.
What Are LED Strip Channels & Profiles?
You may have a different name for it: LED strip channels, LED profiles, LED extrusions, LED strip diffusers, or LED housings.
Whatever you call it, it’s all the same aluminium tracks designed to hold LED strip lights securely in place.
They come with diffuser covers, usually made of plastic (polycarbonate or acrylic), that snap on top to soften and distribute the light evenly.
These profiles serve several important purposes:
- Protection: They shield the LED strip from dust, moisture (check IP rating), and accidental contact.
- Heat Dissipation: Aluminium acts as a heat sink, helping to prevent overheating and extend the lifespan of your LED strips.
- Aesthetic Appeal: Channels create clean, professional-looking lines of light, hiding unsightly wiring and adhesive backing.
- Light Diffusion: The diffuser cover reduces harsh glare and creates a smooth, even glow.
Basically, everything you need for a professional-looking installation.
A typical LED strip profile includes:
- An aluminium base that houses the LED strip.
- A diffuser cover that clips or slides into place.
- Optional mounting brackets and end caps for a tidy, finished look.
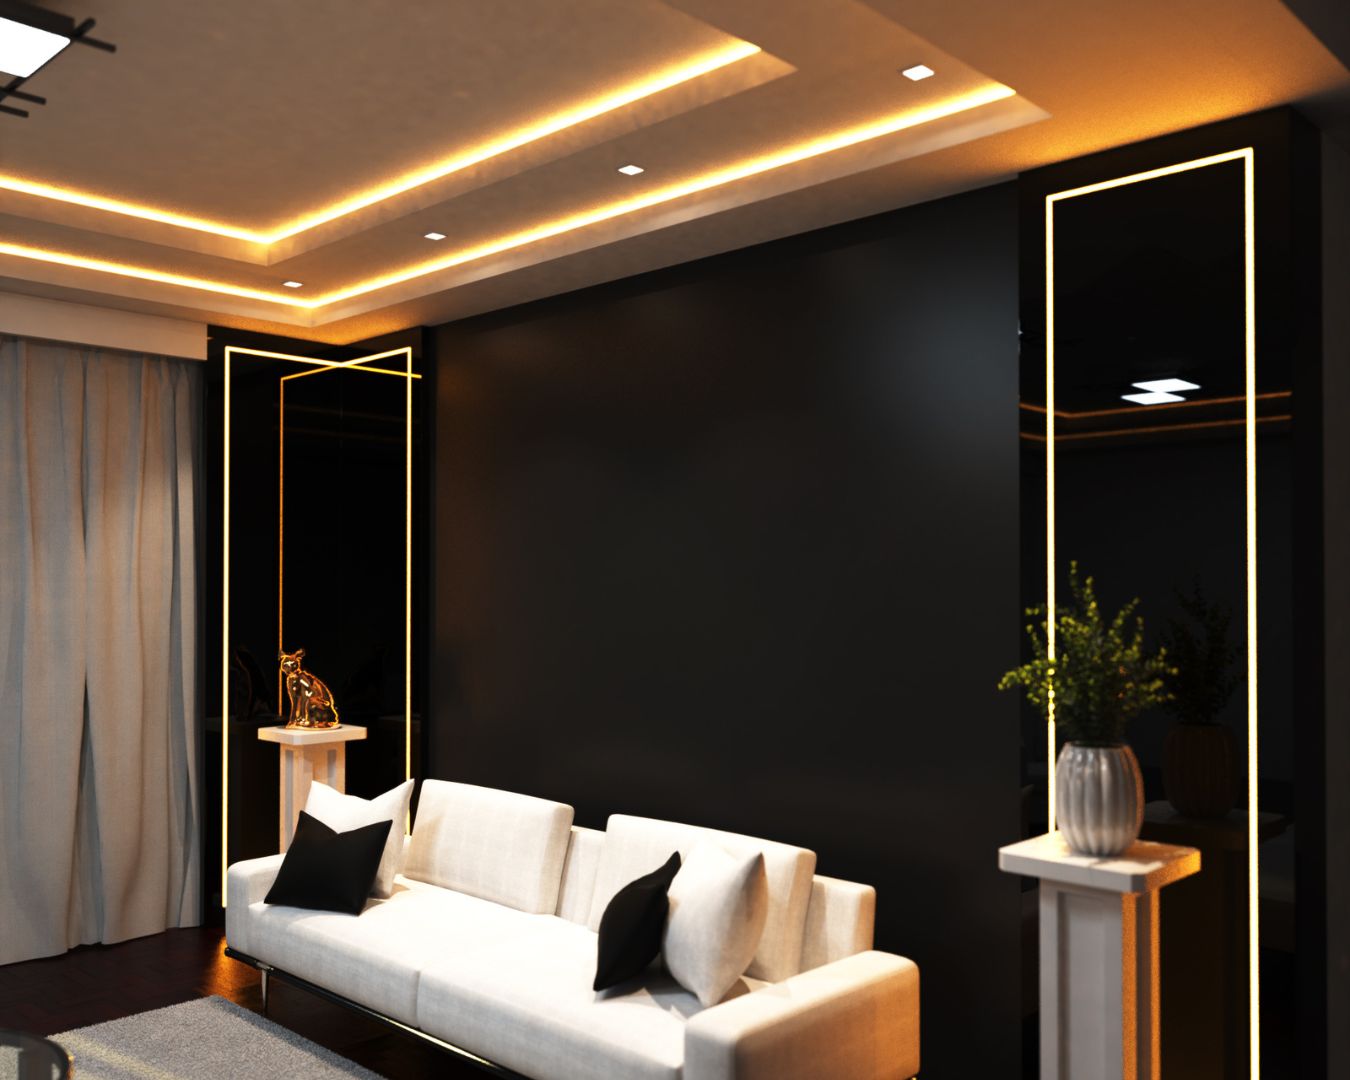
Whether you’re installing task lighting in a kitchen or accent lighting in a living room, LED profiles ensure your lighting looks intentional, not improvised.
You don’t want to spend hours measuring, cutting, and installing your lights only for it to look like a last-minute afterthought, do you?
Types of LED Strip Channels
LED strip profiles come in various shapes and sizes to suit different installations. Understanding the main types will help you choose the right one for your space.
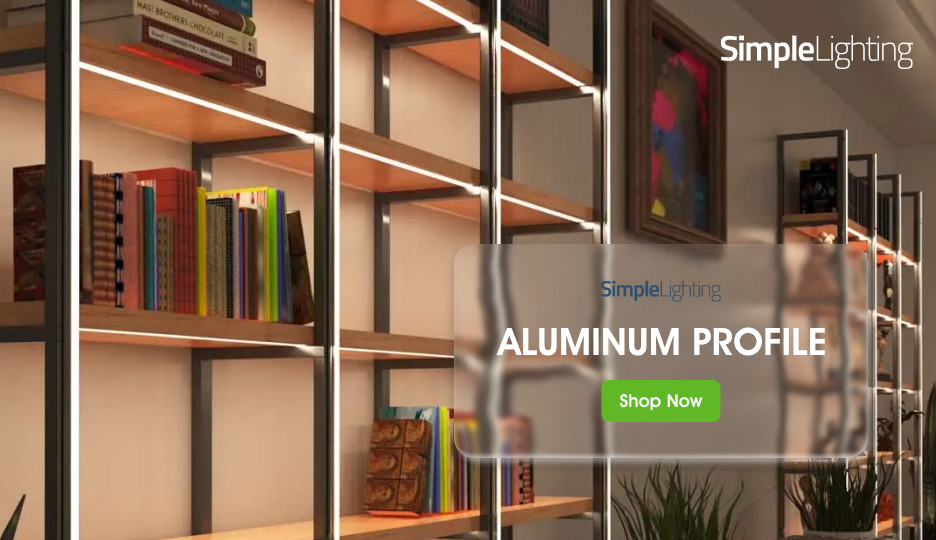
Surface-Mounted Profiles
Best for: Walls, ceilings, shelves, or furniture surfaces
Surface-mounted profiles are the most common and versatile type. They are installed directly onto flat surfaces using screws, clips, or strong adhesive tape.
Because they sit on top of the surface rather than being embedded, they’re perfect for retrofit projects or visible designs where you don’t want to (or can’t) cut into walls or cabinets.
Here are their advantages:
- Easy to install as there’s no wall cutting involved. Ideal for DIY enthusiasts.
- Great for general illumination and task lighting.
- Available in a range of shapes and depths to suit brightness and style preferences.
Use them under kitchen cabinets for worktop lighting, along staircases for safety illumination, or inside shelving units for elegant product or decor highlighting.
Recessed or Embedded Profiles
Best for: Walls, ceilings, floors, and custom furniture
Recessed profiles are designed to be embedded into a surface, such as a plasterboard ceiling, wooden furniture, or tiled wall.
They sit flush with the surface, creating a sleek, modern finish with no visible aluminium edges.
Here are the advantages:
- Perfect for a minimalist or architectural look.
- Excellent for continuous light lines in ceilings or coving.
- Reduces glare since the LEDs are slightly set back within the profile.
Installation typically requires precise cutting and routing of the mounting surface before inserting the channel.
So, it’s more time-consuming than surface mounting, but the result is beautifully integrated lighting that feels built-in rather than added on.
That’s the difference between the two.
But, hey, we’re not done yet.
Corner or Angled Profiles
Best for: Under cabinets, stair edges, display cases, and retail shelves
Corner LED profiles are designed with a 45-degree or 90-degree angle to fit into corners, directing the light outward and downward.
They’re especially popular for under-cabinet lighting, where you want to illuminate worktops evenly without visible light dots.
Here are the advantages:
- Ideal for angled or indirect lighting.
- Helps distribute light evenly across walls or surfaces.
- Conceals wiring neatly along cabinet edges.
Choose corner profiles to create subtle yet functional lighting that enhances depth and dimension in your space.
Flexible or Curved Profiles
Best for: Curved furniture, arches, or creative architectural designs
Flexible LED profiles are made from bendable materials like silicone or bendable aluminium, allowing them to follow curved surfaces or create smooth, flowing light lines.
Here are the advantages:
- Perfect for modern, creative lighting concepts.
- Enables continuous lighting along curved walls or ceilings.
- Easy to cut and shape for custom projects.
These profiles work beautifully in retail environments, curved ceilings, signage, or any area where standard rigid channels wouldn’t fit.
Diffuser Types and Their Effects
What’s the diffuser? It’s the translucent cover that snaps or slides over your LED channel.
While it might seem like a simple accessory, it has a big impact on how your lighting looks and performs. There are three main types you’ll find.
Let’s break them down:
Clear Diffusers
Effect: Maximum brightness, minimal diffusion
Clear diffusers allow almost all light from the LED strip to shine through with little to no softening. The result is bright, crisp illumination, but there’s a chance you may also see individual LED dots of the strip.
These are best for task lighting and areas where maximum brightness is needed.
However, because clear covers don’t blend light as much, they’re less ideal for decorative or ambient applications where uniformity matters.
So, just keep that in mind before getting one.
Frosted Diffusers
Effect: Balanced brightness with soft diffusion
Frosted diffusers strike the perfect middle ground between clarity and softness.
They reduce visible LED dots while still allowing good light transmission, resulting in smooth, pleasant illumination. They’re also the common/popular choice for most residential installations, combining both function and style effectively.
They’re best for general indoor lighting in living rooms, bedrooms, and display shelves.
Opal Diffusers
Effect: Softest, most uniform light with reduced glare
Opal diffusers are fully opaque and create a clean, professional light line with no visible dots.
They produce the most uniform illumination, ideal for modern designs or areas where aesthetics are a priority. They’re ideal for architectural and decorative lighting in commercial spaces, showrooms, and high-end interiors.
Keep in mind that opal covers slightly reduce light output compared to clear or frosted options — a small trade-off for their superior finish.
Other Diffusers
There are still more “less popular” diffusers we’d also like to cover.
Black Profile Diffuser — When the light is turned off, it completely hides the light source, becoming a decorative piece. It can also become completely invisible when installed on a dark surface.
Silicone Profile Diffuser — Soft and flexible cover that can be mounted on curved or ring/circular LED profiles.
Lens Profile Diffuser — This special diffuser narrows down an LED strip’s typical 120-degree beam angle to 10, 30, or 60 degrees, sacrificing range in exchange for higher, more focused brightness.
If you’re aiming for a more creative lighting, don’t forget to check these out as well!
Uses & Benefits of LED Strip Channels
Installing your LED strips inside aluminium profiles isn’t just about looks. You want performance and longevity, too.
Let’s list out the main benefits:
1. Protection
LED profiles shield your strips from dust, moisture, and accidental damage, which is particularly important in kitchens, bathrooms, or outdoor installations.
Check the profile’s IP rating for its water protection level.
2. Heat Dissipation
LEDs don’t generate as much heat as traditional lighting, thanks to the science behind how they produce light… but they still do generate some heat.
And prolonged exposure to this heat can shorten their lifespan.
Aluminium channels act as a heat sink, drawing heat away and keeping the LEDs cool.
3. Aesthetic Enhancement
Profiles hide the strip’s adhesive backing, wiring, and diodes, leaving behind clean, professional light lines that elevate any design.
The more uniform the light is, the smoother it looks.
4. Light Diffusion
With the right diffuser, you’ll enjoy smooth, even lighting that’s easier on the eyes. Perfect for relaxing spaces or professional displays.

Installing LED Strip Channels & Profiles
Alright, now that you have the knowledge of a pro, it’s time to install your LED strips like one.
The good news? With the right tools and preparation, installing LED strip channels is straightforward.
Here’s a step-by-step overview for a professional-looking finish.
Step 1: Measure and Plan
Never start a lighting project without a plan. Start by measuring your installation area accurately.
Decide where each channel will go and note the power supply location. Planning helps avoid gaps and ensures smooth, continuous runs.
You also avoid wasting materials when you have a good layout planned.
Step 2: Cut Channels to Length
Most aluminium profiles can be cut to size with a hacksaw or mitre saw using a non-ferrous carbide blade, provided you have the tool.
Always double-check measurements before cutting. Precision is key.
A simple line to live by: Measure twice, cut once.
Step 3: Mount the Channel
For surface-mounted profiles, use mounting clips, screws, or strong adhesive tape.
Note that clips and screws are more reliable than adhesive tapes, especially for heavy-duty installations.
For recessed LED profiles, you’ll need to cut a groove into the surface (using a router or saw) and then fix the profile flush inside it.
Ensure the channel is straight and secure before proceeding.
Step 4: Install the LED Strip
Clean the inside of the channel and stick the LED strip along the base, ensuring proper alignment. Avoid bending the strip too sharply!
Connect to the driver or controller as per the wiring diagram.
Step 5: Attach the Diffuser Cover
Once the strip is in place and tested, snap or slide the diffuser onto the profile. Make sure it’s securely fitted end-to-end for a seamless appearance.
Step 6: Finish with End Caps
Use end caps to close off the profile ends. This gives a tidy, professional finish and prevents dust ingress.
A Few Safety Tips:
- Always disconnect power before installation.
- Use quality adhesives and fixings to prevent sagging or detachment.
- Avoid covering LED strips with non-ventilated materials.
- Allow for adequate airflow to maintain proper heat dissipation.
These bring us to…
Common Installation Mistakes to Avoid
Even a well-planned project can go wrong with a few simple missteps.
Here’s what to watch out for:
1. Incorrect Measurements
Cutting channels too short or unevenly can lead to unsightly gaps. Again: Measure twice, cut once.
2. Poor Adhesive or Screw Placement
Weak adhesion or misaligned screw holes can cause sagging over time. So, always use the correct fixings for your surface. For adhesives, ensure the surface is clean before mounting the profile.
3. Wrong Diffuser Choice
Choosing a clear diffuser when you want soft ambient light can result in harsh glare instead. It’s pretty self-explanatory. Match your diffuser type to your desired effect.
4. Overheating
If you enclose your LED strips too tightly or skip aluminium profiles altogether, heat can build up, shortening the LED’s life, and putting your safety at risk.
5. Inadequate Planning
Forgetting to plan for cable routing or power supply placement (or skipping it altogether) can lead to messy results or uneven brightness. Always map out the full circuit before installation.
Install It Like a Pro
The secret to professional-quality LED strip lighting installations lies in the use of LED strip channels and profiles.
They offer improved durability and performance.
By understanding the different types of channels and selecting the right diffuser, you can tailor your lighting to any environment, from modern kitchens to cosy living spaces or even outdoor patios.
Whether you’re a DIY enthusiast or a professional installer, taking the time to plan, measure, and install your LED strip channels correctly will ensure your lighting looks (and performs) its absolute best for years to come.
You can browse Simple Lighting’s range of aluminium profiles by visiting our website!
Or you can check out LED Strip Lighting Made Simple: Channels, Controllers, and More for more comprehensive guides like this.


