LED flood lights are a staple in many outdoor and security lighting designs. Aside from its remarkable brilliance, LED flood lights are cost-effective and energy-efficient, so it’s no wonder many people prefer them to illuminate and secure their outdoors!
Installing LED flood lights is relatively easy. You can DIY it as long as you have enough knowledge and experience. Remember, above everything else, your safety is your top priority. If you won’t be able to enjoy your hard work, what’s the point of going through all the trouble? So, to guarantee that you can fully savour your well-lit outdoor space, here are some tips and tricks that you can do to safely and successfully DIY your LED flood light installation!
Understanding LED Flood Lights
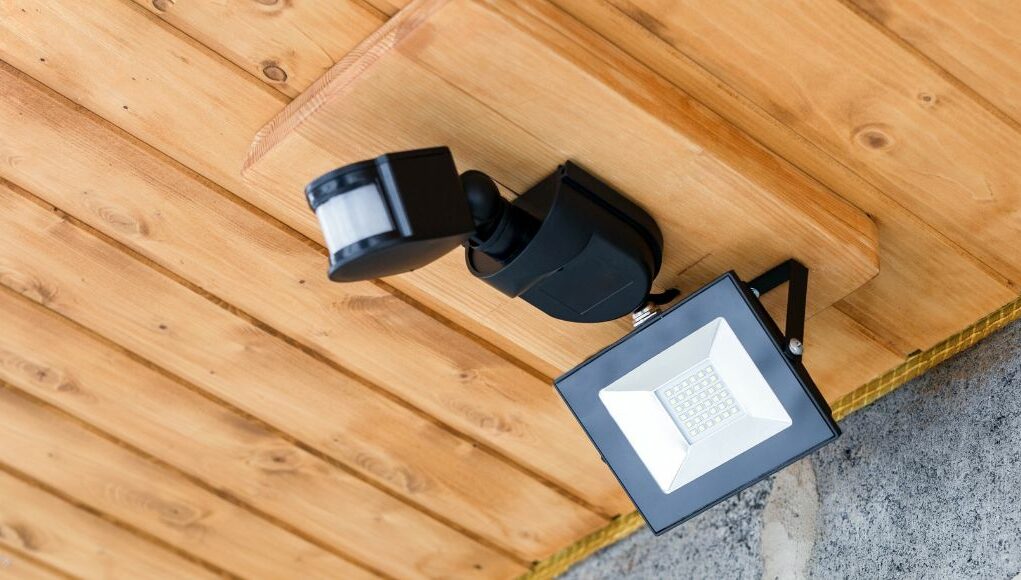
Did you know why LED flood lights are named that way? It’s because they can flood the space with the brilliance they produce! Usually, you’ll see this lighting solution illuminating gardens, pathways and driveways. Also, they’re employed to strengthen the security around the property‘s perimeter.
Aside from that, because LED flood lights are powered by LED technology, they have unparalleled energy efficiency, longevity and luminance!
Safety Precautions and Preparation
Before proceeding to the installation, there are some reminders that you have to know!
Safety First
As mentioned before, safety should be your top priority! Unless you are experienced and knowledgeable, leaving any installation to professionals is best. If you still want to DIY, have someone with experience be there. That way, even if you’re DIY-ing, someone can warn you when it’ll be too dangerous. Also, ensure you have the necessary protective equipment, like gloves and goggles, to avoid risks.
Above everything, never forget to switch off the main power supply before wiring your lights. If you’re living with someone, put a note and let them know that you switched off the power because you’re installing a lighting fixture.
Planning and Preparation
Another thing that you need to do before mounting your flood lights is planning and preparation. This stage is crucial because this is where you decide the placement of the flood lights, the model you’ll get, the specs you need, the quantity you have to purchase, etc. All the details are organised when you’re planning, so it’s better to iron it out for a few days than rush everything and have issues down the road.
Also, ensure that you prepare all your tools before D-day, so you’ll know ahead of time whether you have to rent, purchase, or borrow. Some of the things you need when installing LED flood lights are electric screwdriver or drill, ladder, wire cutter and wire stripper, electrical tape, voltage tester, wire connectors, flood light fixture, junction box, and mounting hardware.
Step-By-Step Installation Guide
Depending on the model of your LED flood light, there may be some differences with the mounting instructions. However, here are some tips you can use as a general guide!
Mounting the Fixture
Your LED flood light will come with mounting hardware that secures it to your chosen location. Read the manual of the model you have and follow the steps as instructed. Ensure that everything is aligned and fastened securely to avoid instability and movements.
There are several mounting options that you can do with your flood lights (depending on what you have), including pole-mounted, wall-mounted, or ground-mounted. Find the best mounting method for your application and ensure you have the necessary hardware for your chosen option.
Wiring and Electrical Connections
Doing this step will require a lot of technical skills; therefore, it’s best to leave it to an electrician or someone you know who is skilled with electrics.
In this step, you must strip the wires with a wire stripper and connect the corresponding wires from the fixtures to the junction box using wire connectors. Link the wires with the same colours together using wire nuts or electrical tape. Since you’re installing your flood lights outdoors, you must ensure that the junction box, connector, flood lights, etc., are all waterproof.
Position and Angle
If you’re using the LED flood light as general outdoor lighting, mount it at a height between eight to twelve feet. On the other hand, if it’s for security purposes, keep it at a height between twelve to fifteen feet.
While you should direct the flood light to the areas you want to illuminate, ensure that it will not cause light pollution. Consider the windows of the others in the vicinity, and don’t position the light beams towards them. Only place LED flood lights in the necessary areas, and don’t put them where it’s not needed.
Testing and Adjustment
Before finishing and finalising the installation, ensure that you test if the LED flood lights are working and connected correctly. Also, check if the beam is pointed to the areas you want and it’s not directed towards your neighbour’s window.
Testing is a necessary step before sealing everything because you’ll be able to catch and address any malfunctions early on. If there’s something wrong with the connection, you can check if it’s not linked correctly. If the light beam is not where you want, you can tilt it until you get the correct position!
Conclusion
DIY-ing the installation of LED flood lights is quick and easy. However, you should not take on the project if you’re not confident. While it’s fulfilling to do it yourself, keeping yourself safe is far better. However, if you have enough experience, you can use these tips and tricks to ensure your project proceeds smoothly! If you’re looking for premium-quality LED flood lights, you can visit our website, Simple Lighting. We have an extensive collection of LED flood lights and other indoor, outdoor, and commercial lighting solutions!


