


Kitchen lighting isn’t just about “setting the mood.” While you’re not running a Michelin-star restaurant, you’ll still want to see what you’re chopping. That being said, the kitchen is a jungle of wires, steam, and splash zones. And adding electricity to the mix ain’t cute.
Every year, DIY heroes decide to “have a quick go” at installing new lights. Half of them end up blowing a fuse, if not their confidence. So before you start channelling your inner electrician, hit pause. This isn’t a TikTok hack; it’s real wiring, real current, and very real consequences if you get it wrong.
With the right plan, proper gear, and a healthy dose of caution, you can make your kitchen bright, safe, and smugly stylish — without lighting yourself up in the process.
Why Kitchen Lighting Safety Matters
The TL;DR is, because safety keeps your kitchen (and you) in one piece. Before you start measuring pendant heights and bragging about your “DIY skills,” let’s discuss further.
Kitchens and Electricity: A Risky Relationship
Here’s the thing about kitchens: they look innocent, but they’re absolute chaos for electricity. You’ve got water splashing around, appliances humming, heat rising, and condensation doing its best to sneak into every socket. It’s like a mini weather system with knives.
Now add DIY wiring into that environment, and suddenly your “simple light upgrade” becomes a potential fire hazard with mood lighting. A loose wire, the wrong fitting, or a bit of overconfidence can all lead to tripped circuits and melted cables. And if you’re really unlucky, it can even result in a dramatic puff of smoke that smells suspiciously expensive.
And no, “it worked fine when I tested it” doesn’t count as electrical certification!
Why Proper Installation Isn’t Optional
Because it will make sure your shiny new LED strip doesn’t turn into an indoor sparkler. Safe fittings, dry connections, and correct circuit loads aren’t optional extras; they’re survival tactics.
Safety Tip: Electricity doesn’t forgive “close enough.” Always check your connections and use certified fittings. If something looks dodgy, stop IMMEDIATELY.
The Bright Side of Doing It Right
When you get it right, your kitchen lighting not only looks brilliant, it is brilliant. It will be efficient, compliant, and entirely drama-free. Trust us, nothing kills a dinner party faster than the smell of burning insulation.
Plan Before You Wire – Understanding Layout & Zones
Every great kitchen lighting setup starts on paper (or at least on the back of a takeaway menu). Think of it like chess with cables: one wrong move, and your “brilliant idea” could leave half the kitchen in the dark. So before you start cutting holes or drilling blindly into the ceiling, stop and plan.
Mapping the Battlefield (aka Your Kitchen)
Not all areas are created equal. Kitchens have zones, and knowing them is the difference between a safe install and a costly call to an electrician.
- Wet Zones. Located around sinks, dishwashers, and hobs. These areas need moisture-resistant fittings. Look for IP44 or higher. Anything less is basically asking for a shock.
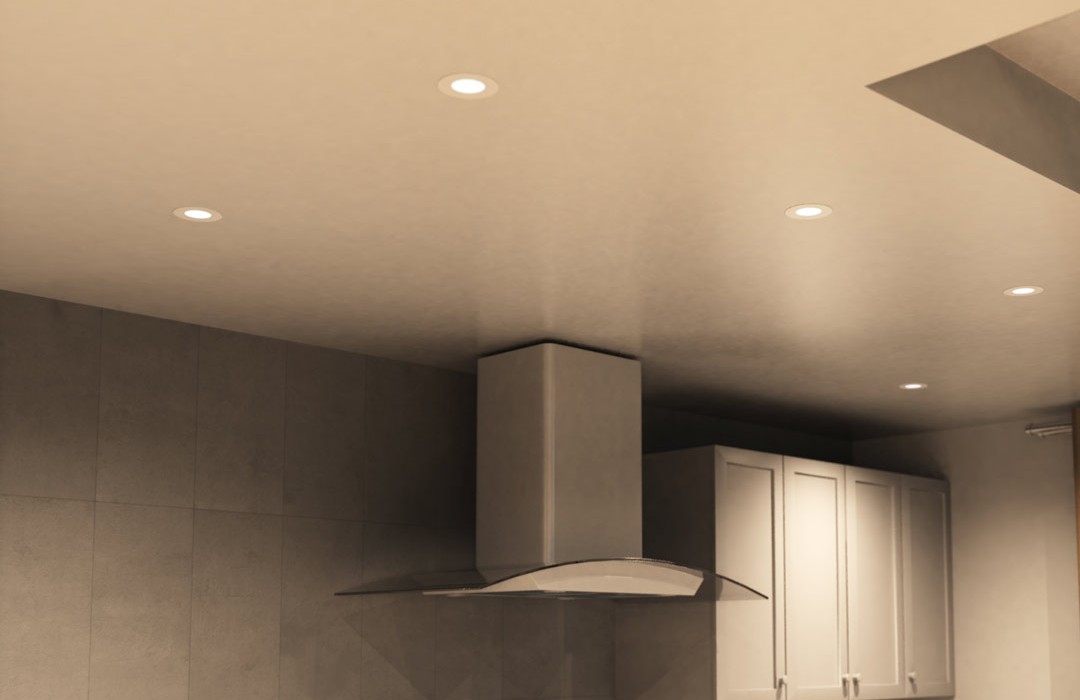
- Task Zones. Your worktops and cooking areas need bright, focused lighting that doesn’t cast awkward shadows when you’re trying not to lose a fingertip.
- Ambient & Accent Zones. These add depth and warmth. Under-cabinet LEDs or plinth lights work wonders here. They’re subtle, but transformative.
Safety Tip: Water splashes further than you think. If you’d wipe it down, it probably counts as a wet zone.
Understanding UK Regulations
If you’re in the UK, your electrical work should pass Part P of the Building Regulations. In simple terms, any wiring changes need to be done safely and inspected by someone who actually knows what they’re doing.
IP ratings are your best friend here. The higher the number, the more protection you get against dust and water. It’s like armour for your fittings.
When in Doubt, Phone a Professional
If you’re not 100% confident, don’t wing it. Wiring mistakes aren’t “learning experiences,” they’re insurance claims. A quick chat with a trustworthy electrician can save you money, stress, and possibly your kitchen.
Tools and Materials Checklist
If you’re about to start wiring without checking your toolkit, congratulations! You’ve already made your first mistake. Before you even think about climbing that ladder, make sure you’ve got the right gear. Half of safe installation is preparation. The other half is not electrocuting yourself.
Your toolkit should include:
- Screwdrivers (flathead and Phillips)
- Voltage tester (to make sure “off” actually means off)
- Drill and bits for ceilings or cabinets
- Wire stripper and cutter
- Junction boxes and connectors
- Measuring tape and pencil
- Ladder (the sturdy kind, not your dining chair)
These are optional, but smart:
- Circuit tracer (helps you find the right circuit without playing electrical roulette)
- Stud finder (saves you from drilling into a pipe and crying later)
Use the Right Materials
Stick to BS-compliant cables and fittings. That little stamp isn’t decorative; it means your components meet UK safety standards.
And go for LED fittings. They run cooler, last longer, and won’t roast your ceiling like the old halogen dinosaurs did.
Safety Tip: Cheap connectors are tempting, but so are fireworks. Both have similar endings if used indoors.
Step-by-Step Installation Overview
Alright, toolkit ready? Good! Power off? Better be! Let’s walk you through a safe, sensible lighting installation (no shortcuts, no smoke, no drama).
Step 1 – Switch Off Power and Double-Check
This one’s not optional. Go to your consumer unit (the fuse box, for the non-electricians) and turn off the circuit you’ll be working on. Then check with a voltage tester (because “I think it’s off” is how horror stories start).
Safety Tip: Always test before touching. Your nerves (and hair) will thank you.
Keep the area dry, wear rubber-soled shoes. And avoid working in socks unless you fancy being a cautionary tale.
Step 2 – Plan and Mark Lighting Positions
This is where you make it look intentional, not accidental. Mark where your fittings will go using a pencil. For downlights, keep the spacing between them around 1.2 to 1.5 metres to avoid uneven brightness.
Need lighting under cabinets? Keep strips tucked out of direct view. Pendants? Hang them roughly 75 to 90cm above a countertop. That way, they won’t be so low that you headbutt them every morning.
Pro Move: Take a photo of your layout before you start. It saves arguments about “wasn’t it more to the left?” later.
Step 3 – Mount Fixtures and Route Wiring
Now comes the part where you actually get something done. Cut or drill holes carefully (measure twice, cut once), and mount your fittings securely. Use proper fixings, not whatever screws you find rolling in the junk drawer.
When routing wiring:
- Avoid sharp bends that can damage insulation.
- Keep cables away from heat sources.
- Use conduit where possible. It’s tidy, protected, and professional.
Safety Tip: Wires shouldn’t look like spaghetti. Keep them neat and clipped.
Step 4 – Connect and Test
This is where things can go very right — or very wrong. Connect your wires to the mains or LED driver, matching live, neutral, and earth correctly. Tighten everything properly; loose connections are flicker magnets and fire starters.
Once connected, restore power and test each light. If one doesn’t work, turn the power back off before investigating.
Remember: Confidence is fine. Overconfidence is what keeps electricians in business.
Electrical Regulations and Safety Standards
Now that you’ve got lights that actually turn on (and you’re still standing), it’s time to talk rules. Yes, the boring part, but also the bit that decides whether your installation is safe, legal, and insurable.
Part P: The Law of the Land
As mentioned above, all household electrical installations in the UK must follow Part P of the Building Regulations.
You can usually swap an old light fitting yourself. But if you’re extending or altering circuits, they need to be tested by a qualified electrician. That’s not red tape; that’s common sense.
Safety Tip: If it connects to the mains, it’s not a YouTube job.
Understanding IP Ratings
IP ratings tell you how well a fitting can handle dust and water. Here’s the quick breakdown:
- IP20. Fine for dry ceilings far from sinks.
- IP44. Splash-proof, perfect near hobs or basins.
- IP65+. Basically waterproof. Use this if there’s steam, spray, or regular chaos.
Pro Move: Always go higher if you’re unsure. You’ll never regret extra protection, but you might regret saving a tenner.
Certified Components Only
Stick to fittings that are UKCA- or CE-certified and use RCD-protected circuits. Those tiny details can literally save lives.
Remember: When it comes to electricity, “close enough” isn’t close at all.
Common Kitchen Lighting Installation Mistakes
You’ve got the tools, the plan, and the confidence — basically the lethal combination. But even careful DIYers trip up on the small stuff, and that’s usually what causes the big problems. Let’s go over the classics before you add your name to the Hall of “It Seemed Like a Good Idea at the Time.”
Overloading the Circuit
Adding six extra downlights to an already packed circuit might sound harmless. But it can blow your fuse faster than your patience. Always check the circuit load and wattage. A quick calculation now saves you a pitch-black kitchen later.
Safety Tip: Know your limits (and your breaker’s, too).
Using the Wrong Driver or Transformer
LEDs are fussy. Pair the wrong driver with your lights, and you’ll end up with flickering, buzzing, or lights that die young. Match voltage and wattage exactly. This isn’t the place for “close enough.”
Loose or Crooked Fittings
If your lights look like they’re escaping the ceiling, something’s gone wrong. Loose fittings expose wires and trap heat. Not a fun combo.
Mixing Voltage Types
Connecting 12V and 230V systems together is not “innovative wiring.” It’s how smoke alarms get tested. Keep them separate and clearly labelled.
Skipping Ventilation
Heat kills LEDs. Make sure recessed fittings have breathing room. Or enjoy replacing them every few months.
Pro Move: A little airflow goes a long way. Your lights will thank you by lasting years, not weeks.
Finishing Touches – Testing, Adjusting & Maintenance
You’ve survived the wiring, nothing’s sparking, and your kitchen isn’t glowing for the wrong reasons. Now it’s time for the final check. Because while installation is about precision, the finishing touches are what make it look like you knew what you were doing all along.
Testing the Setup
Turn the power back on and test every light. Look for flickering, uneven brightness, or that one fitting that refuses to join the party. If something’s off, turn the power off again before touching a thing. Nine times out of ten, it’s just a loose connector or mismatched driver.
Safety Tip: If you’re guessing instead of knowing, stop and call a pro. Guesswork belongs in game shows, not electrical work.
Adjusting for Perfection
Play with placement and brightness until your lighting feels balanced. Tilt downlights for even coverage, dim your task lighting for evening ambience, and make sure nothing’s shining directly into your eyeballs.
Pro Move: Stand back and test it at night. That’s when inadequate spacing reveals itself.
Keep It Working (and Safe)
Maintenance isn’t glamorous, but it’s essential.
- Power off before cleaning or replacing bulbs.
- Wipe with a dry cloth. No sprays near fittings.
- Check connectors and drivers once a year.
It’s a few minutes of effort for years of reliable light. Think of it as your kitchen’s annual MOT (without the grumpy mechanic).
Flip the Switch on Great Lighting

So there you have it! Your kitchen’s wired, shining, and (best of all) still standing. You’ve dodged the flickers, the fuses, and the fire hazards. Not too shabby.
But remember, great lighting isn’t just about looks. It’s about function, comfort, and a touch of pride every time you hit that switch.
If this guide taught you anything, it’s that good lighting takes more than enthusiasm and a screwdriver. Precision, patience, and the right tools make all the difference between “bright idea” and “burnt circuit.”
When you’re ready to do it right, Simple Lighting is your go-to. From sleek under-cabinet LEDs to smart downlights that transform your space, we’ve got everything you need to turn your kitchen from dull to dazzling.
Or if you’re still looking for more kitchen lighting discussions, you can find more at Choosing the Best Lighting for Your Kitchen.


